10. Accessing the Payment Tool
Payment is a tool that is used to carry out payment tasks in poimapper application. It includes different pricing packages which are:
- Explore
- Light
- Pro
- Custom
For more information on these packages kindly visit http://www.poimapper.com/pricing/
How to Access the Tool
When a user logs into the portal and has administrative rights, the ‘Admin’ button is enabled; clicking this button directs the user to the Admin tool. When on the Admin tool, the payments button appears under the drop down menu on the account holders’ name/admin. Figure 19 shows where the payments button appears.
Choosing Payment Options
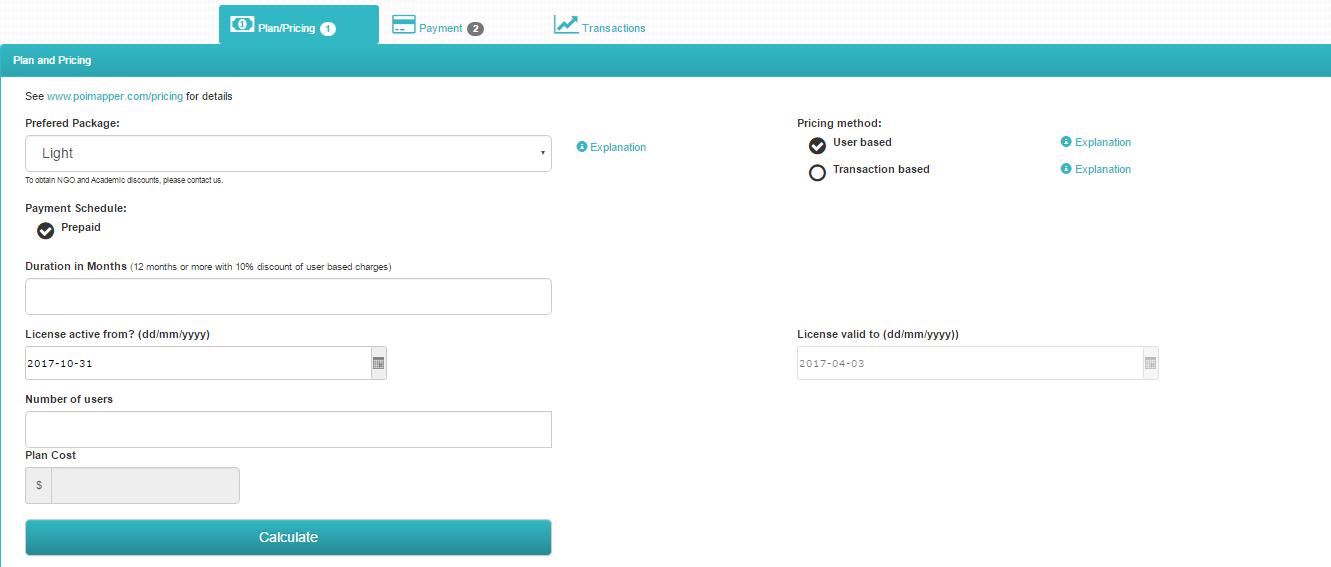
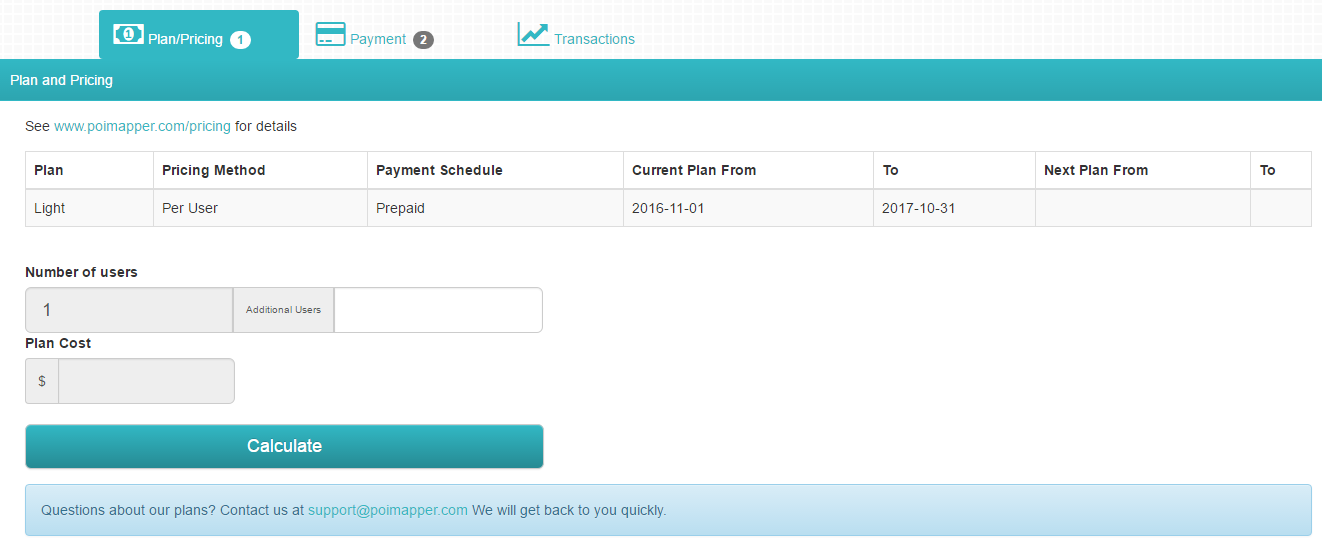
Clicking on the payment button redirects the user to the Payments page. Figure 20 below shows the default payment page that appears after clicking on ‘payments’ button.
You’ll then choose your preferred package (Explore, Light, Pro or Custom) and choose a pricing method which includes:
- User based- On this method, all active users except viewers are charged a monthly fee. The total monthly number of active users is the maximum of active users IDs and device IDs during the month.
- Transaction based- Office users with admins, modelers and ordinary roles are charged a monthly fee and enumerator based on uploaded filled forms and subforms.
You’ll then fill in the required fields, i.e. Duration in months, License active from date, License valid to date, Number of users and then click ‘Calculate ‘ to get the plan cost. Then proceed to payment.
Making the Payment
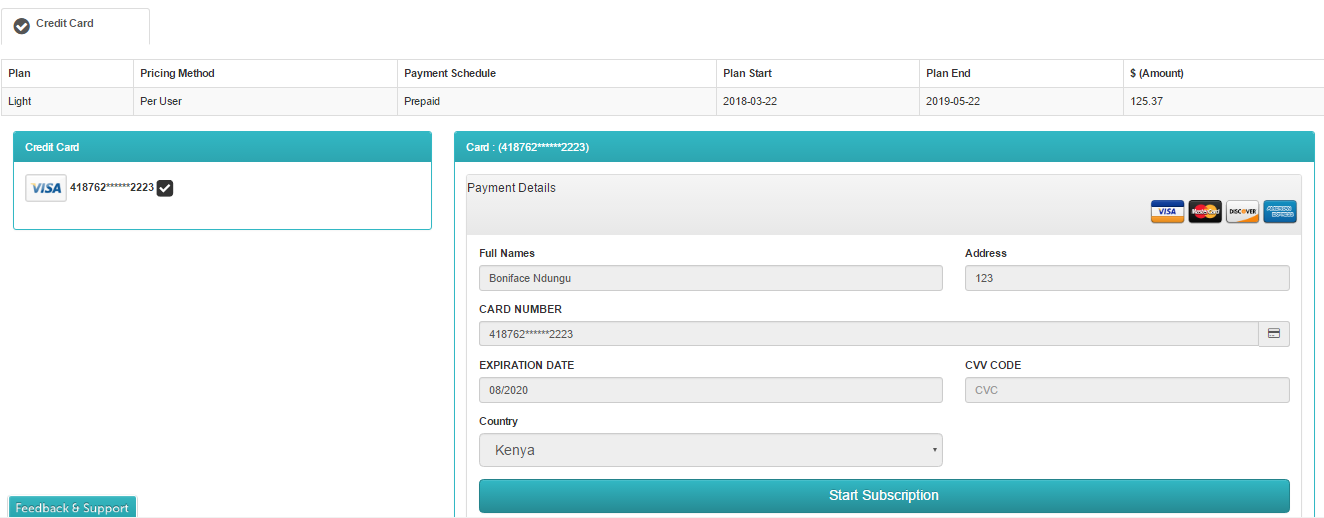
After clicking on ‘Proceed to Payment’ you’ll be prompted to give your credit card details. Figure 21 shows the credit card details view.
When you are done filling all the fields then click ‘Start Subscription’ and a pop up will appear as shown in Figure 22
You then click on ‘ok’ to process subscription and your account will be immediately updated.
If there is insufficient funds in your card you’ll get an error message as shown in figure 23
Adding Next Plan
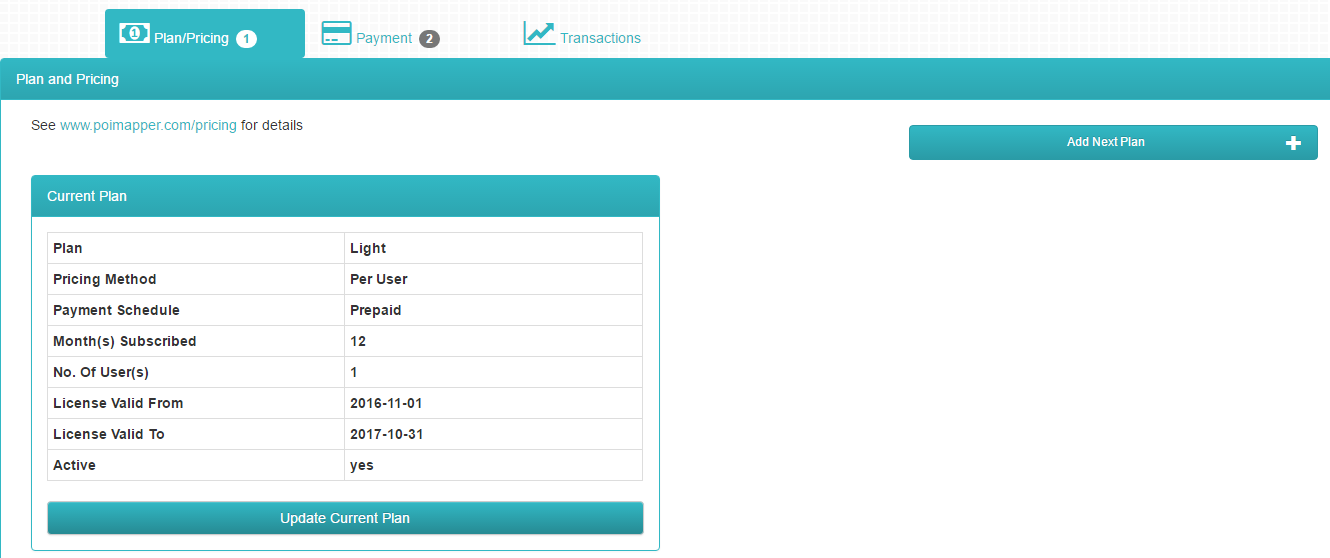
After updating the current plan, it is possible to add next plan before the current one expires. Figure 24 shows ‘Add next plan’ option.
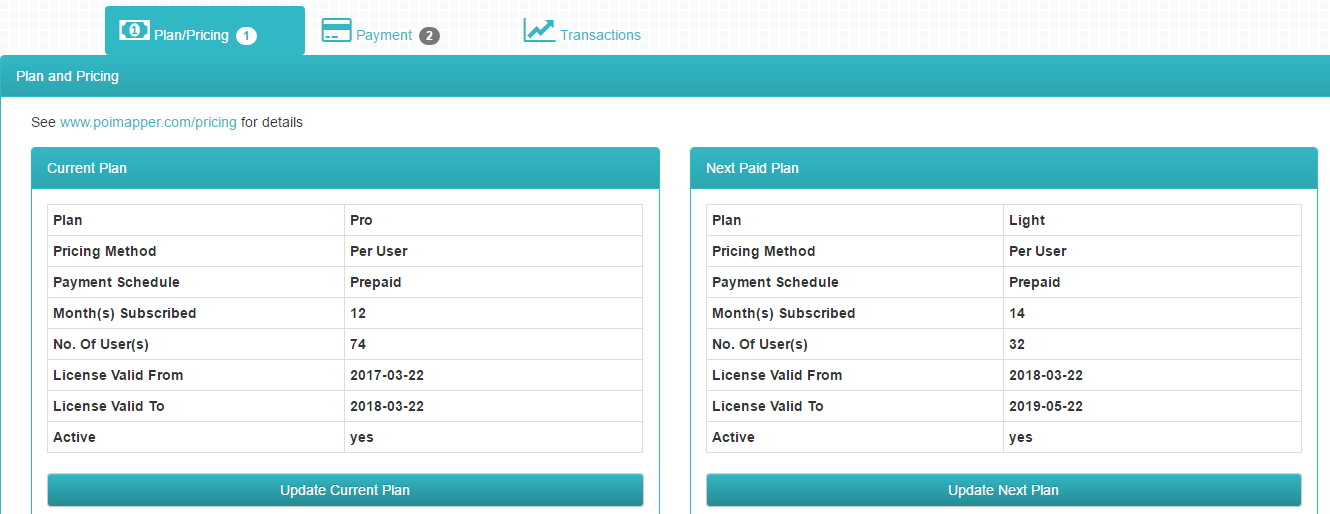
The steps followed when adding a next plan are just the same as the ones you follow when updating the current one. Figure 25 shows the Adding next plan Main view
Updating Current Plan/Next Plan
You can also update the current plan for instance, the number of users increase or so. This update page only gives you the option of filling in the number of additional users since all the other fields will have been filled already.
