Documents Feature
Introduction
This feature is a lightweight management system that users can use to store and access both exported data points and other documents. To access this feature, click on the document tab as shown in the figure below.
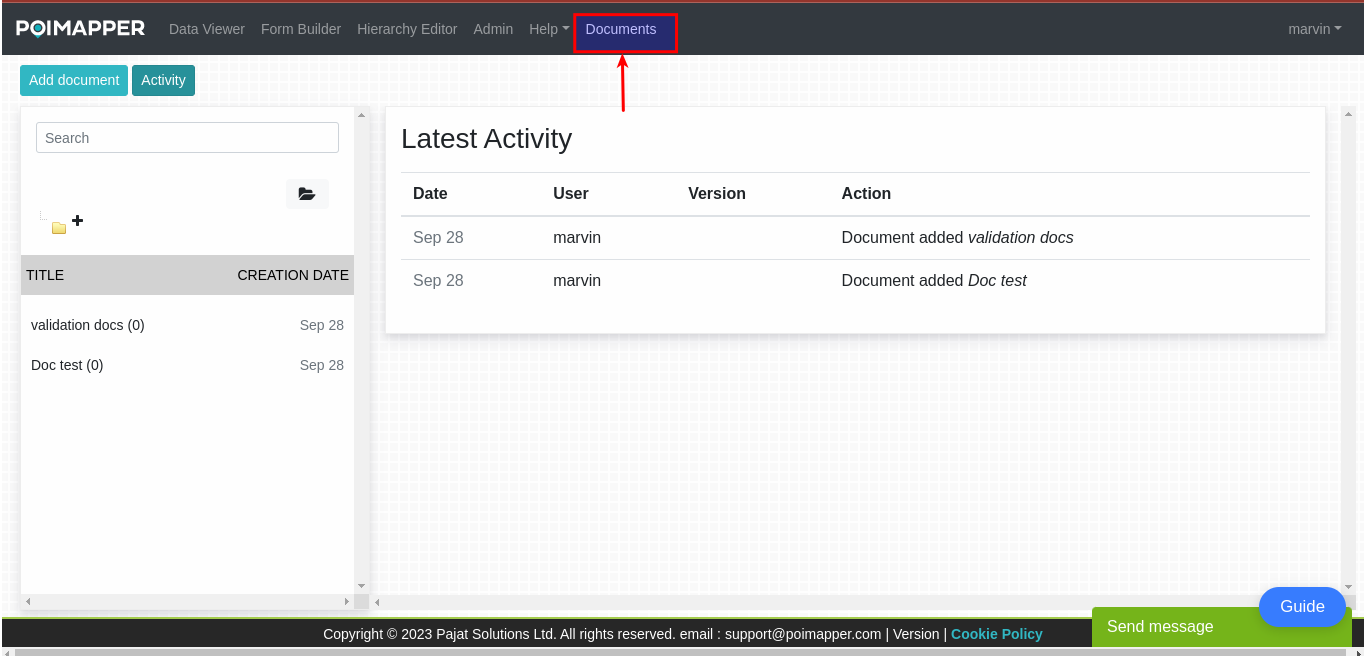
Figure 1: Document Introduction
Add document
To add a document, follow the below steps
Click on the Add document button.
Fill in the the mandatory fields(marked with a red asterix).
Choose a file you want to add and click save.
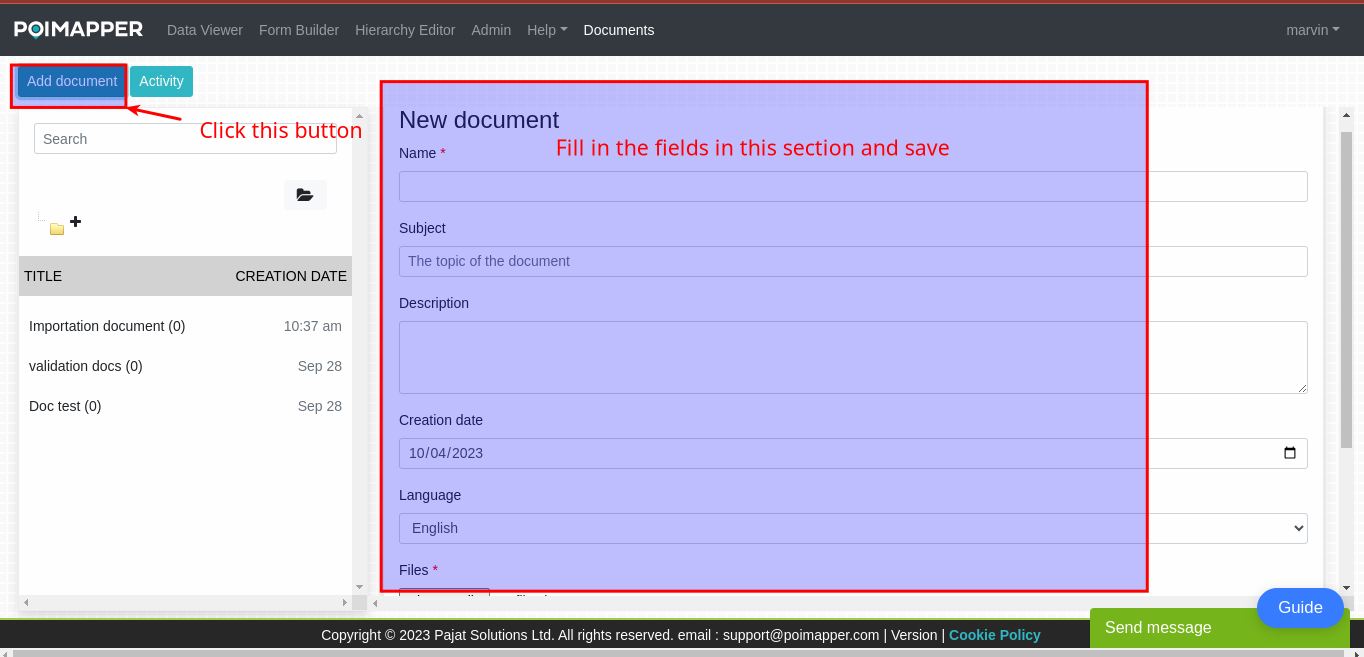
Figure 2: How to add a document
If successfull, you will see a new record with the document name on the left column. The latest activity will also be updated showing that the document was added.
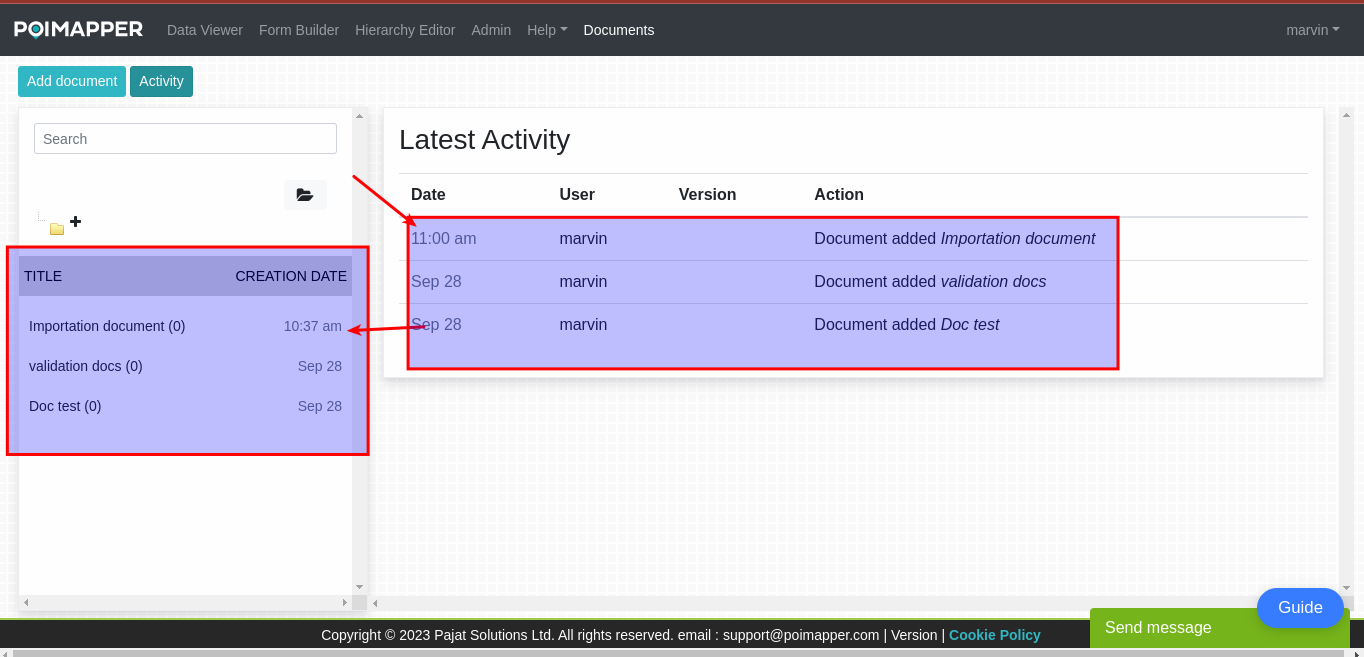
Figure 3: Added documents
Activity
Clicking this tab will display a list of recent activities on the documents feature. This activities include adding a document, updating a document and deletion of a document. The list is arranged chronologically with the latest activity appearing at the top.
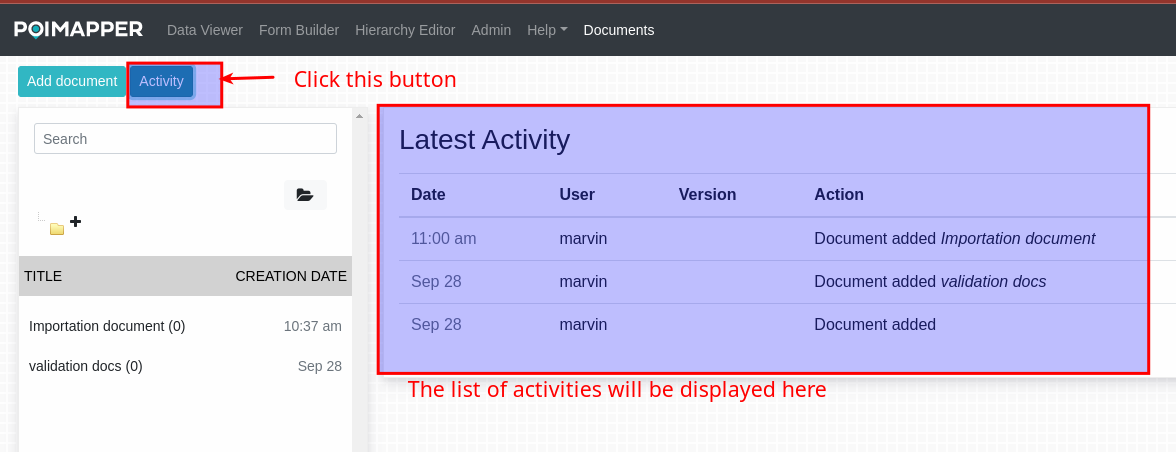
Figure 4: latest activities
Search
The search bar will allow you to find a document quickly and efficiently. By entering specific keywords or phrase, a list of documents matching the query will be displayed.
Add folder
Folders help users organize their files and data in a logical and structured manner. By grouping related files together in a folder, users can quickly locate and access the information they need.
How do you create a folder and add files to the folder in our system?
Below the search bar, click on the folder icon
Another folder icon with a “+” sign will be displayed
Click on the folder with the “+” icon
A modal will pop up. Input the name of the folder.
Click on save
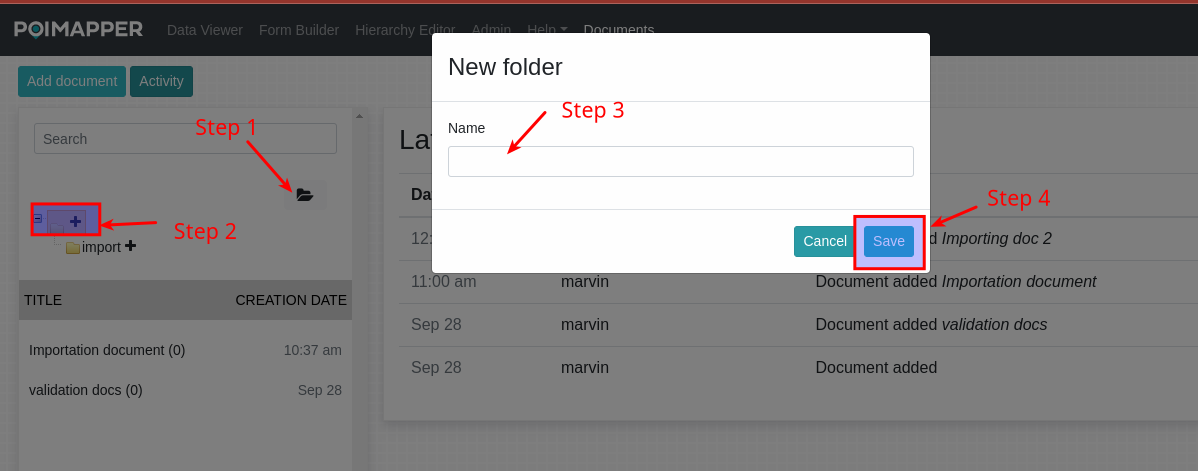
Figure 5: Creating a folder
Now to add a document to the newly created folder
On the folder icon, expand the folder by clicking on the small “+” sign on the left side of the folder icon.
Click on the folder you wish to add a document to.
Once selected, Click on the Add document button at the top.
Follow the steps to add a document as described in the Add document section
If successfull, when you select a folder, the documents in the folder will be displayed.
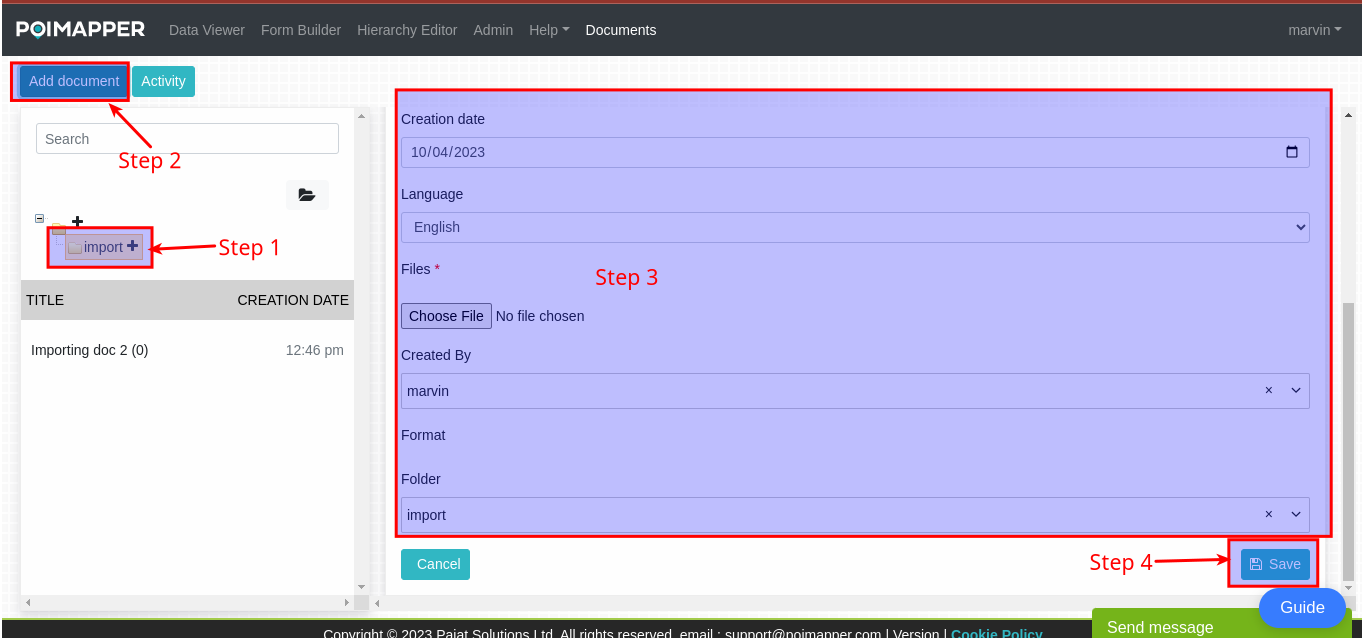
Figure 6: Adding a document to a folder
Actions for documents
On selecting an added document, several actions will be displayed on the right column. See the figure below.
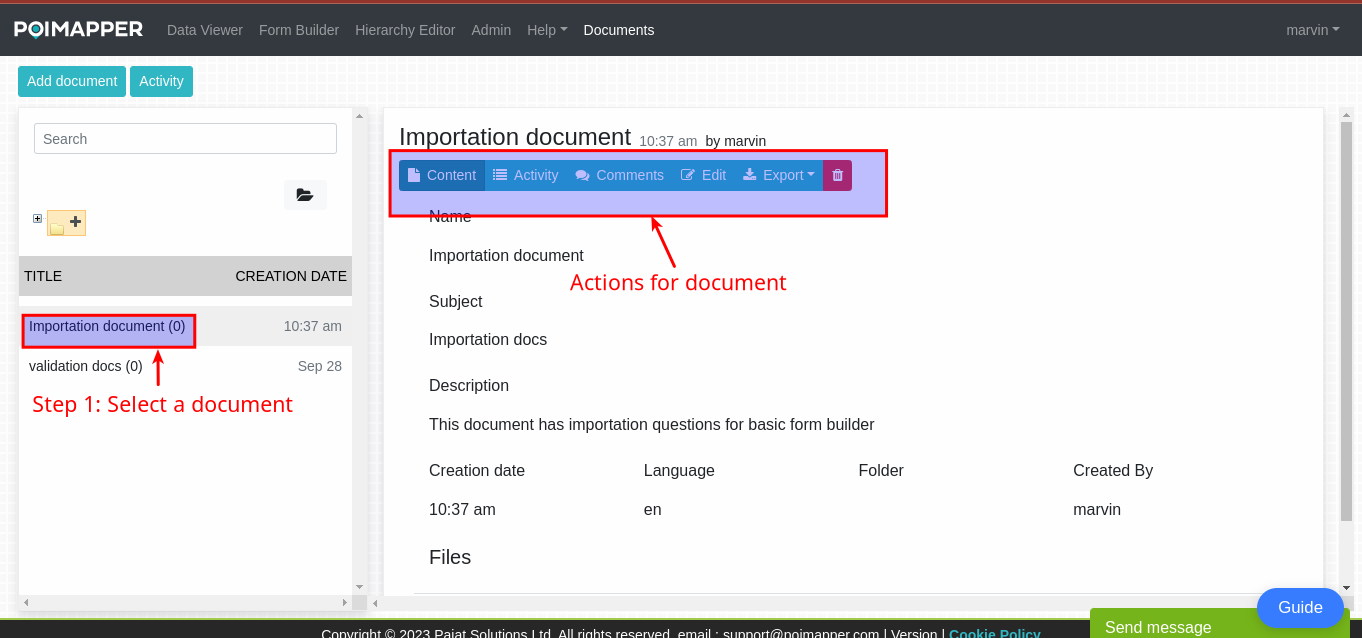
Figure 8: Actions for documents
Content - Selecting this action will allow the user to see the document details such as name of document, description, subject, creation date, created by and files.
Activity - The activity tab displays user activities on the document such as adding, editing and deleting the document. The activity tab will have date of the activity, user, version and the action.
Comments - This allows the user to add a comment to a document.
Edit - This action allows the user to edit the document details. Creation date and creation by are not editable. After editing a field, click on the + New version button at the bottom and add the version and change log and click save.
Export - The export actions allows the user to export either the document created or the file attached to the document to their local computer.
Delete - This action gives the user the ability to delete a document from the system.
Export document from Data viewer
This allows the user to store their exported file to the documents system. To access this feature follow the below steps
While on the data viewer tab and the feed tab is selected, open a datapoint you want to export.
Click on the export button
Check on the Export as Document checkbox
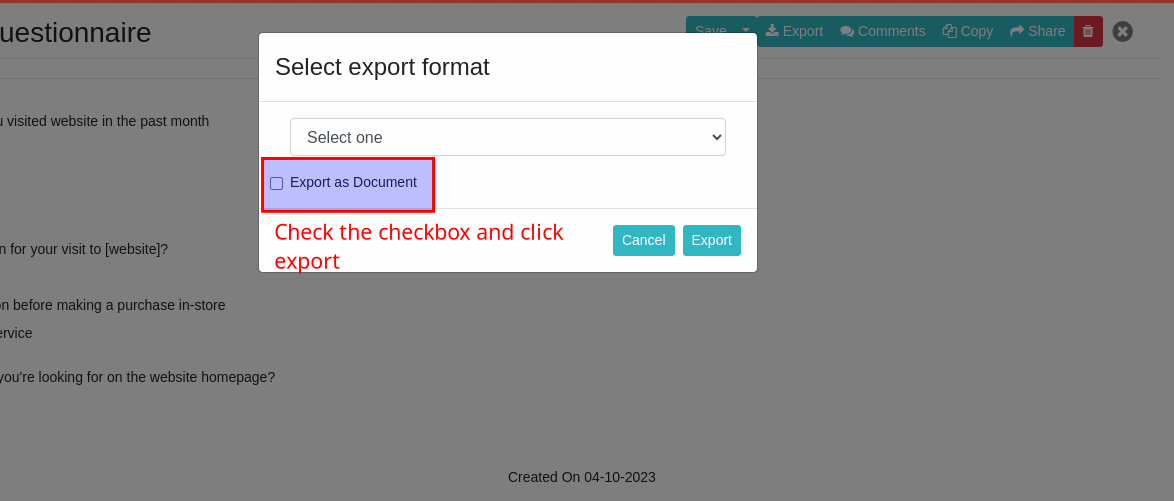
Figure 9: Export as document checkbox
More fields will be displayed on the modal. Fill in the mandatory fields.
Click on the Export button