Hierarchy Editor
The Hierarchy Editor is used to define location hierarchies. To access the Hierarchy Editor, click on the ‘Hierarchy Editor’ link on the main menu. The figure below shows the main screen displayed when the ‘Hierarchy Editor’ link is clicked and a hierarchy on the hierarchy panel is clicked on. The hierarchy editor comprises of three parts:
Hierarchy Panel - this is where hierarchies that are saved to the database are displayed.
Workspace Area - this is the working area where created hierarchies are displayed.
Attributes Panel - this is where hierarchy attributes are displayed.
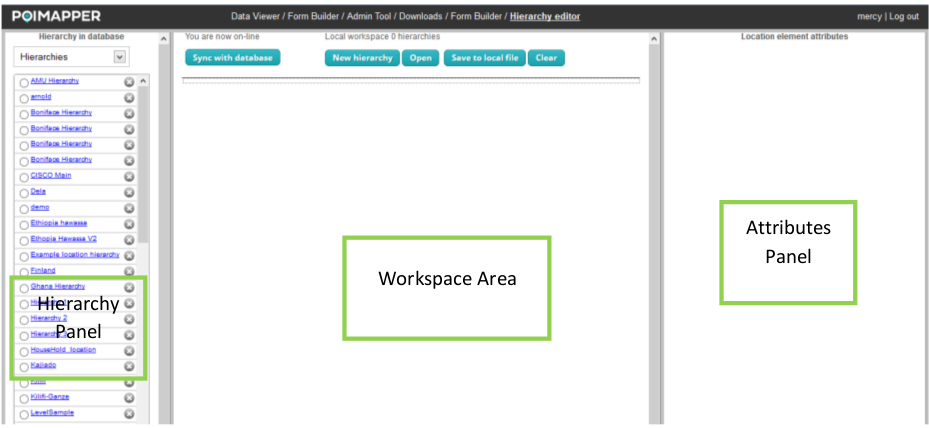
Figure 50: Hierarchy Editor Main Menu
Creating a New Location Hierarchy
The Hierarchy Editor of the Form builder allows a user to create a location hierarchy up to four levels. The four levels usually correspond to the administrative hierarchy of an area.
To create a new location hierarchy, click on the ‘New hierarchy’ button. Select the location hierarchy on the workspace to enable definition of the location levels in the attributes panel. See the figure below.
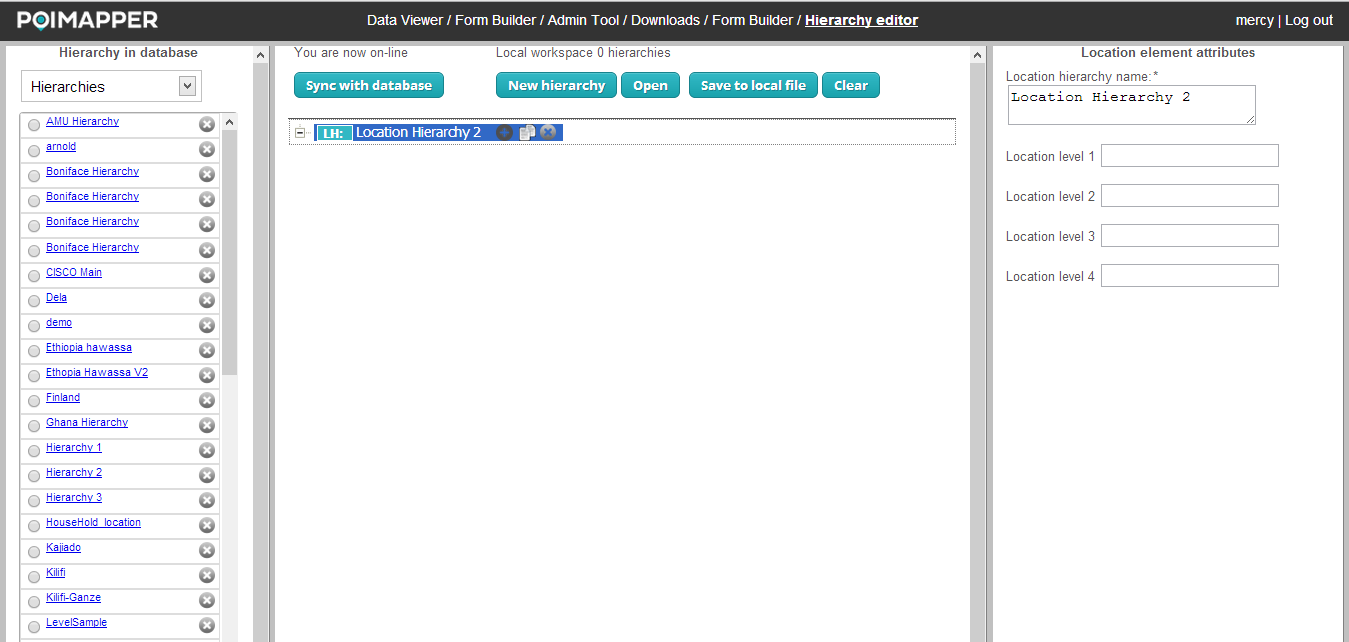
Figure 51: Creating New Location Hierarchy
After defining the location levels, one can add up to four locations by clicking the + button next to the hierarchy name in the workspace. See figure x below illustrating four locations added for the levels national, province, district and county defined. One may also set a map view for each location from the attributes panel by zooming in to the view you wish to set.
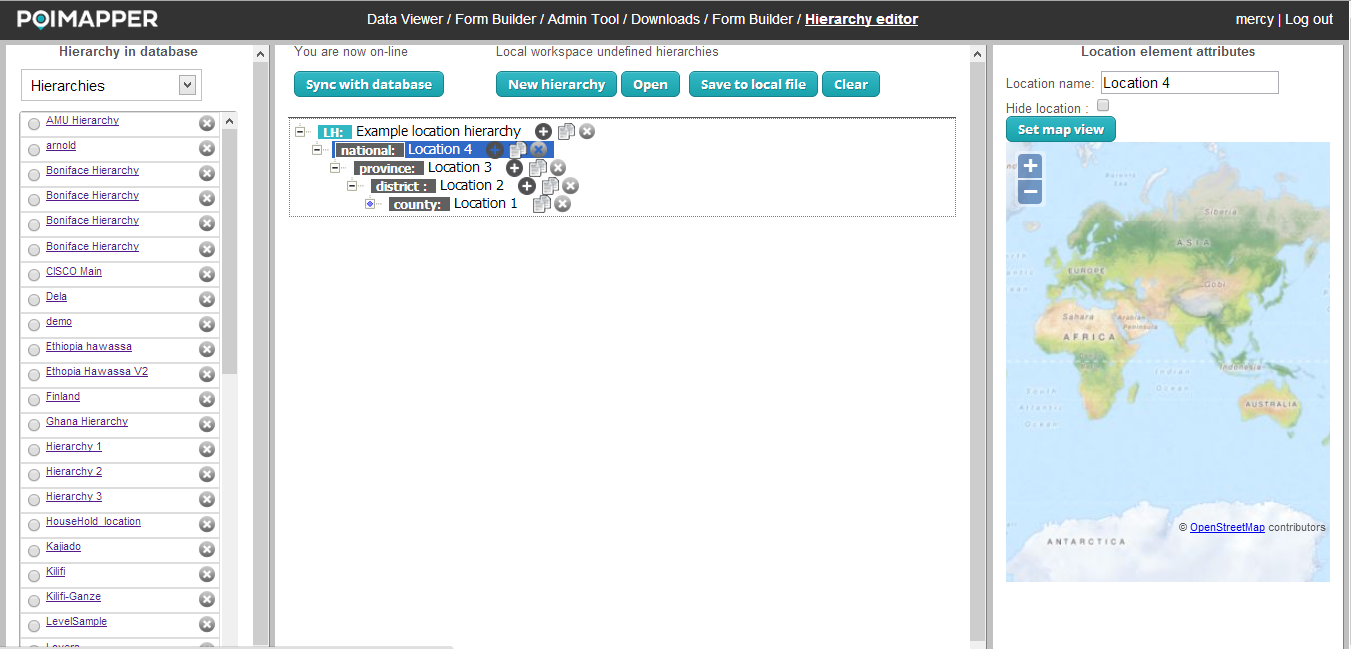
Figure 52: Set Map View of Defined Location
Saving a Location Hierarchy
After defining a location hierarchy and editing it appropriately, the next step is to save the location hierarchy for future use. A location hierarchy can be saved in two ways: locally in an XML file and remotely in a database.
Saving a location hierarchy locally as an xml file
A location hierarchy can be saved locally as an XML file to create a local backup copy of the location hierarchy or if internet connection is lost to avoid losing work done. To save a location hierarchy locally, click the Save to local file button. This will prompt the user to either open or save the generated XML file. Figure below shows the dialog window prompting the user to either open or save the generated XML file for the defined location hierarchy.
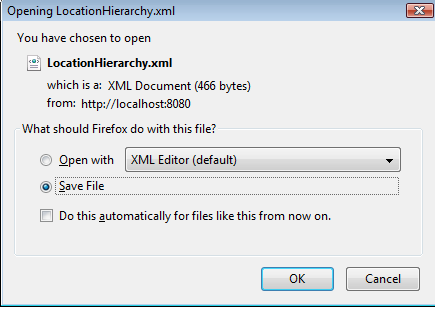
Figure 53: Dialog window prompting the user to either open or save the generated XML file
The saved XML file for the location hierarchy can later be loaded in the Form builder as explained in section 4.3.1 of this document.
Saving a location hierarchy to the database
For a location hierarchy to be used in other PoiMapper applications such as the mobile client, web portal and the Admin tool, the location hierarchy has to be saved in the database. To save the defined location hierarchy in the database, click the save to database button. A confirmation message will be given regarding the status of saving the location hierarchy.
Loading an existing Location Hierarchy
Location hierarchies that already exist can be loaded in the Form builder. Location hierarchies can exist either in the local machine as XML files or remotely in a database. Please refer to section 4.2 of this manual for more information about saving a location hierarchy.
Loading a Location Hierarchy from a Local File
To load a location hierarchy that has been saved to a file locally (please see section 4.2.1 on saving a location hierarchy locally), click on the Open button. A dialog window appears allowing the user to select the location of the file in the computer. After clicking the ‘open’ button, the location hierarchy is loaded on the workspace.
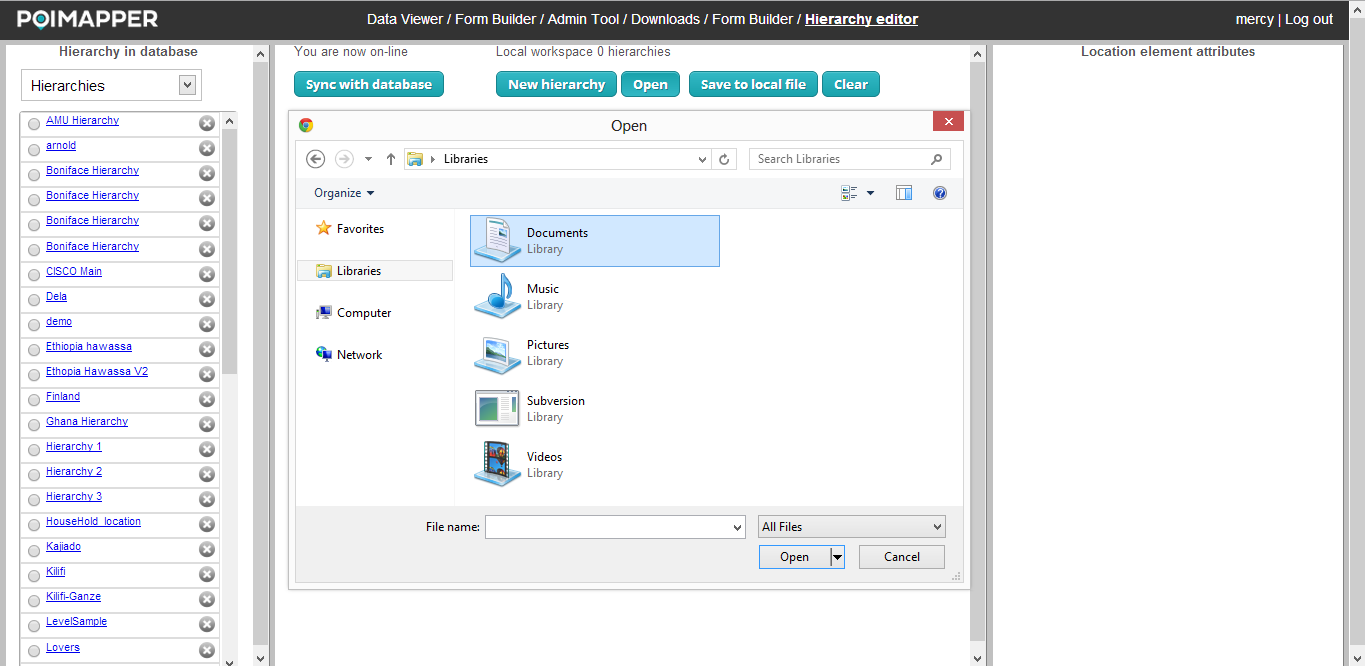
Figure 54: Loading a Location Hierarchy from a file
Loading a Form From the Database
To load a location hierarchy that is saved in the database, click on a hierarchy name from the Hierarchy panel on the left. The selected hierarchy is loaded on the workspace.
Deleting/Archiving a Location Hierarchy
This is done in a similar manner as the forms. Refer to section 3.8 of this document. A location hierarchy saved to the database can only be archived but not deleted. Archived hierarchies just like forms can be restored.
New hierarchies that are not saved to the database can be deleted from the workspace by clicking the X button next to the hierarchy name.
Searching a Location Hierarchy
This feature gives the user the ability to search for a specific location hierarchy.
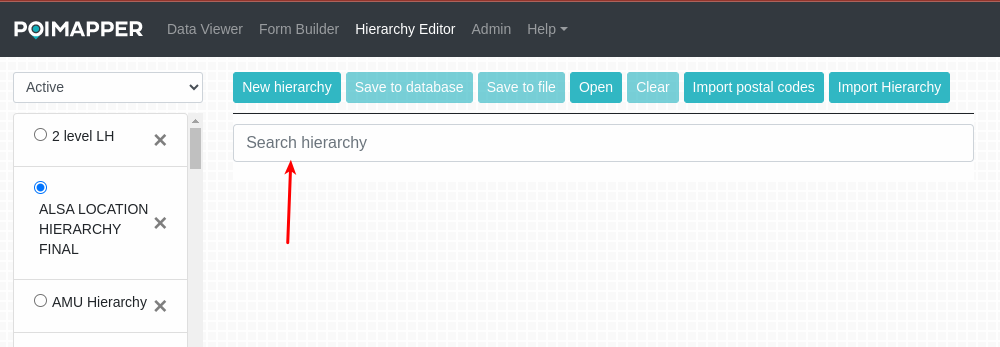
Figure 55: Search Hierarchy
To search for a location hierarchy follow the below steps:
Click on the location hierarchy to open it.
In the search field, input the location hierarchy you wish to find.
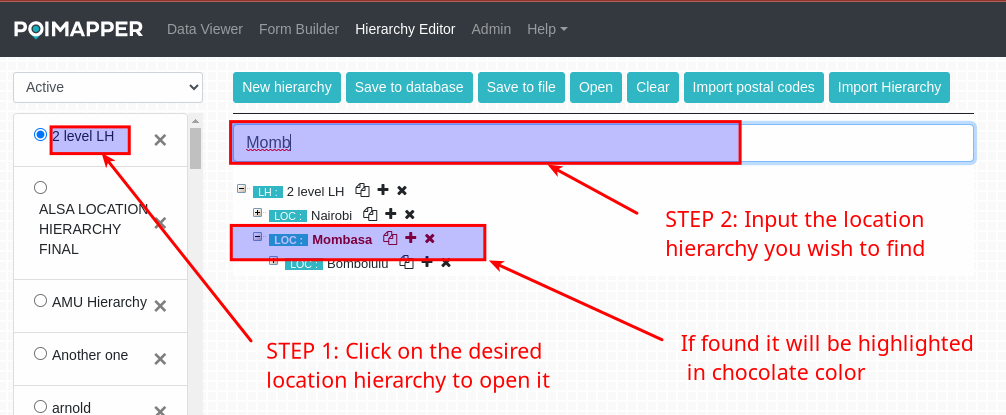
Figure 56: Steps to search location hierarchy
If the location hierarchy you searched for is found, it will be displayed in chocolate color.