Adding Campaigns
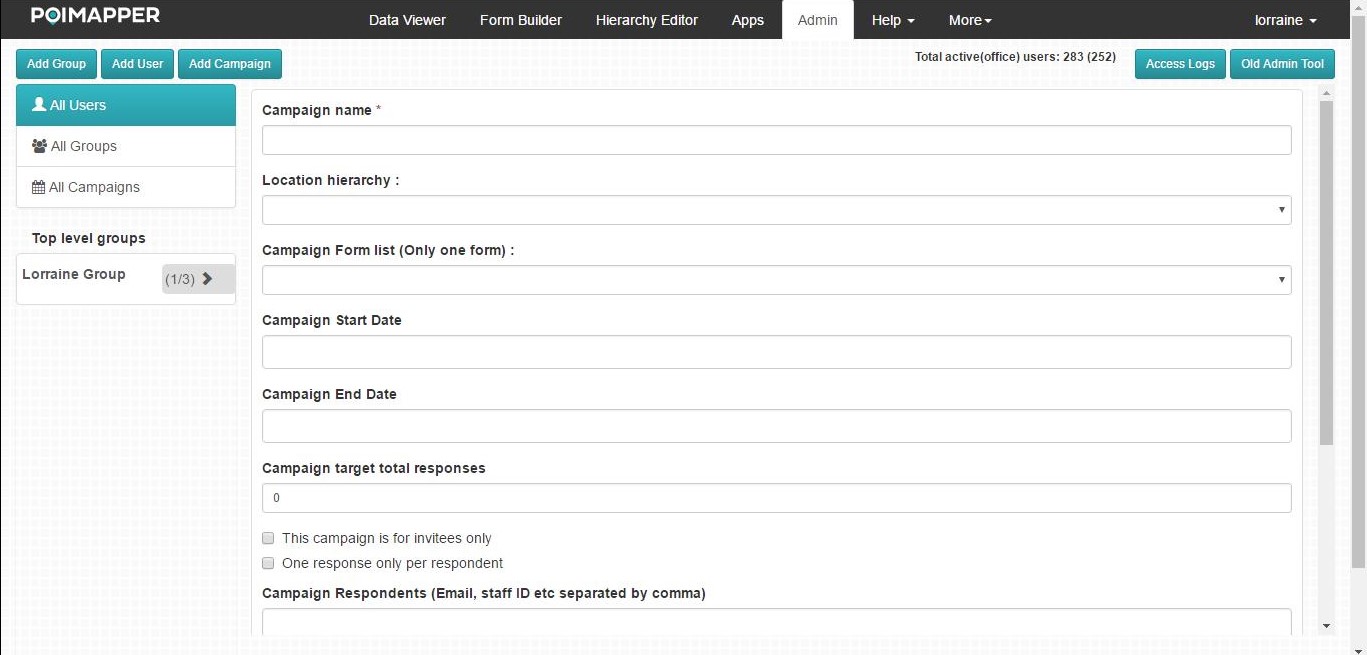
To add a new campaign, click on the ‘Add Campaign’ tab. The fields marked with an asterisk ‘*’ are mandatory. Figure 14 below shows the screen that is displayed after clicking the ‘Add Campaign’ tab.

Figure 14 : Adding Campaign
The location hierarchy field contains a drop down list of all the location hierarchies that can be used for the campaign. Location hierarchy is not a mandatory field, therefore, in cases where the location hierarchy is not used, the field can be left blank.
The Campaign Form field Contains a drop down list of forms , whereby you can only choose one form that can be used for the Campaign.
You can then decide if the Campaign is for invitees only by selecting the ‘This campaign is for invitees only’ checkbox or leave it open if you want the campaign to be open just for anyone. You can also decide if you want the campaign to have only one response from one respondent or multiple response from one respondent by either selecting the ‘One response only per respondent’ checkbox or not selecting it respectively.
You do not have to fill in the “Campaign Link’ field since you’ll receive the link once you’ve saved the campaign.
After filling in the relevant information in the form, click the ‘Save’ button to save the campaign details.
Editing An Existing campaign
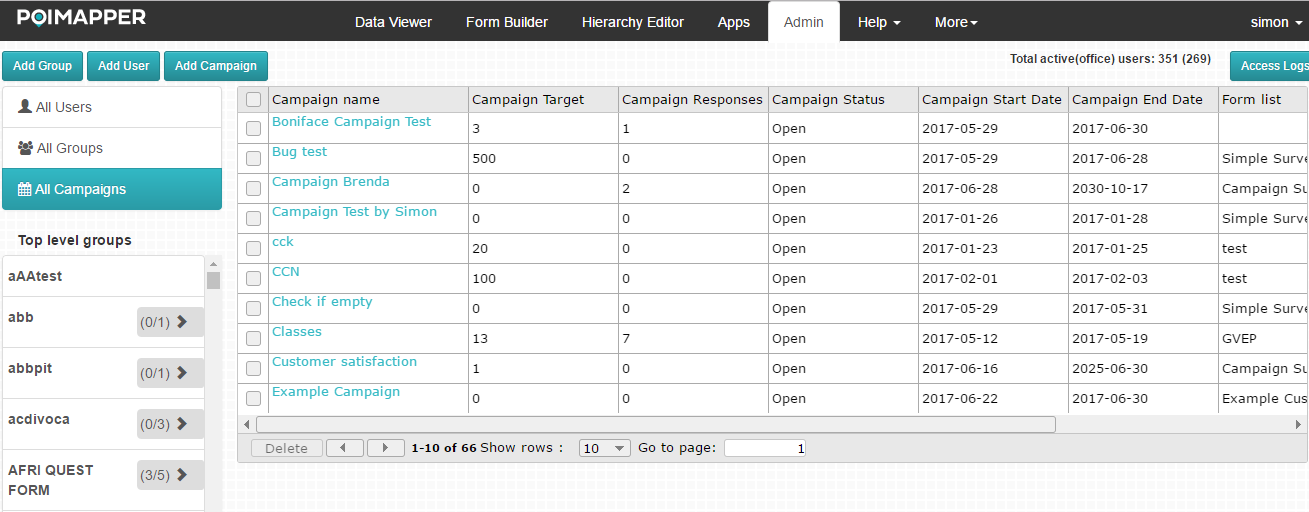
After creating a campaign, you might need to edit it later on, for some reasons, like: extending the campaign period, adding expected number of respondents and so on. To Edit an already existing campaign, still under the admin tool, just below All users and All groups button, there is an ‘All Campaigns’ button as shown on figure 15 below.

Figure 15 : Edit a Campaign
Clicking on it, a table with all the existing campaigns will appear. From the table you can just click on the campaign you want to edit and the pre-filled campaign details will appear for editing.