Creating New Users
To create new users, click on the ‘Add User’ tab; the form shown in Figure 6 below is displayed. There are five distinct user levels, namely:
ordinary user
viewer
task assignee
enumerator
modeler
administrator.
An ordinary user can collect data using the mobile client and also log in to the web portal. However, the ordinary user can neither access the Authoring tool nor the Admin tool.
A viewer can log in to the web portal and view collected data on map view, table and single instance views. He can however not edit the data. The viewer also does not have access to add data point, reports and export features on the data viewer. In addition the viewer does not have access to the Mobile Client.
A task assignee can log into the portal and only view the task view.
An enumerator can use the mobile application to upload or download data that has been collected. Enumerator user can also access the web portal but has no access to the admin tool and form builder tabs. Though the enumerator may access the data viewer, he does not have access to export and reports features. Depending on rights enabled by the administrator in the group enumerator settings, he may or may not edit and or delete data.
A modeler has all the rights of an ordinary user and in addition the right to access the Authoring tool which is used to create forms and location hierarchies. However, the modeler cannot access the Admin tool.
An admin user is a powerful user who has access to all the applications and advanced features in the web portal and the Admin tool.
Fields marked with an asterisk ‘*’ are mandatory.
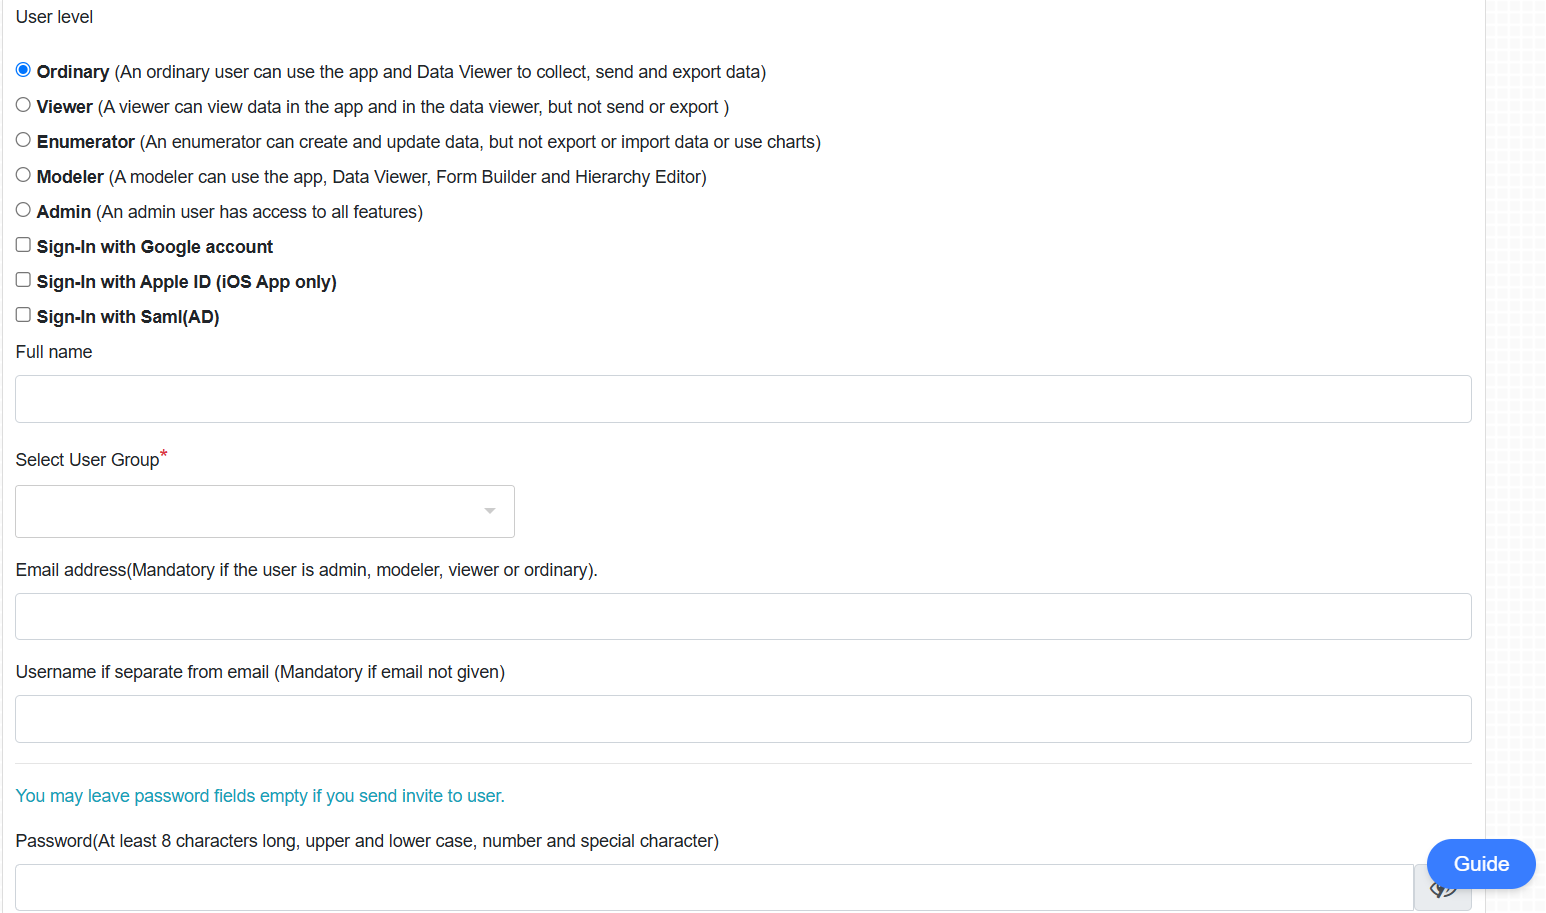
Figure 6: Adding Users
Right below the User Level options. there are two Sign-In options
Sign-In with Google Account- This option allows the user created to log in using their google account.
Sign-In with Apple ID(iOS App only)- This allows the created user to log in using their Apple ID, option only applies for users using Apple products or rather the iOS App.
Sign-In Saml (AD)- This option allows for Security Assertion Markup Language log in. To use SAML to log in, an Admin User is required to add and edit Saml identity Provider Configuration first. This is done under the username drop down menu, on clicking the saml configuration on the menu, a pop to edit or add configuration then appears.
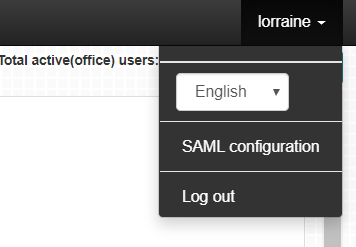
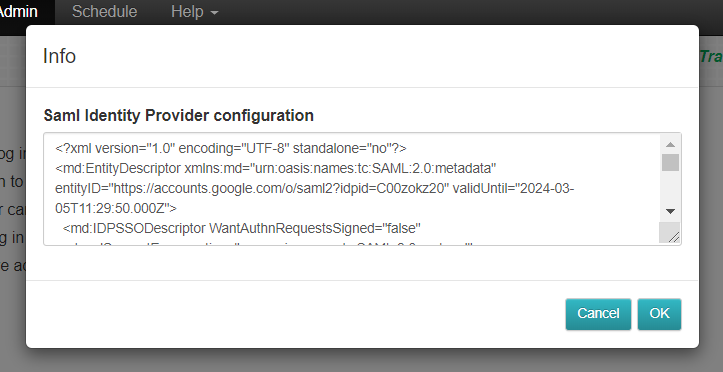
Figure 7: Saml Configuration
Remember a group can be associated with a location hierarchy (see section 3). The location hierarchy associated with a group, if any, appears directly below the ‘Select User Group’ field after a user group is selected.
All users are associated with one or more locations and they can download data for the associated locations.
Figure 8 below shows the location hierarchy that appears for an ordinary user after selecting a user group associated with a location hierarchy.
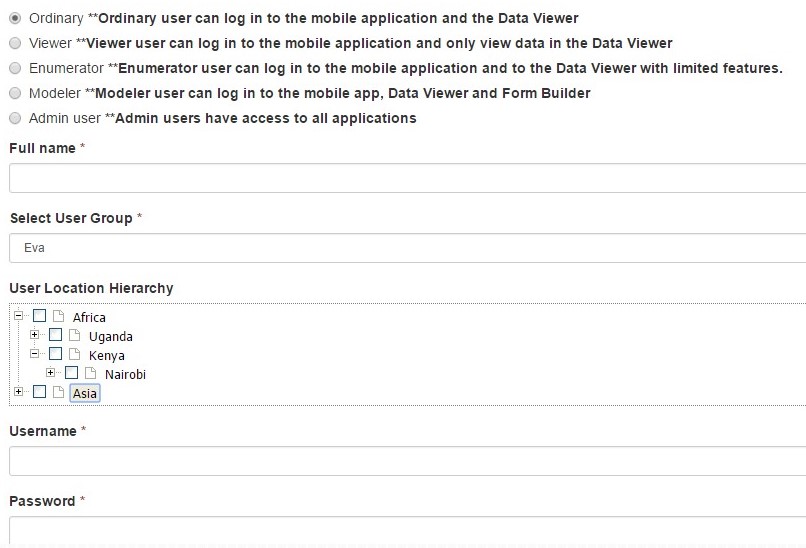
Figure 8: Location Hierarchy associated with the selected group that appears after selecting a user group
To view the sub locations in the Location Hierarchy, click on the + button beside the hierarchy name. To select more than one location in the tree, click on the check boxes located on the left of the locations and select the locations you would like to associate the user with.
Email address field is mandatory if the user is admin, modeler , viewer or ordinary. Only exception is for Enumerator users.
Username field is mandatory if email was not given
The Password field can be left blank if you are planning to send invite to user, whereby an auto-generated password will be sent to the user. You can also set a password for the user. The view buttons allow you to reveal and hide the password.
Send Invite
Send invite is a feature that allows a new user to define their own password, by following a link that is sent to their Email immediately after their credentials have been created and saved. This Option has an ‘Invite Template’ button, that allows one to define and modify how the invite email will appear from the new user’s end. See Figure 8 below.
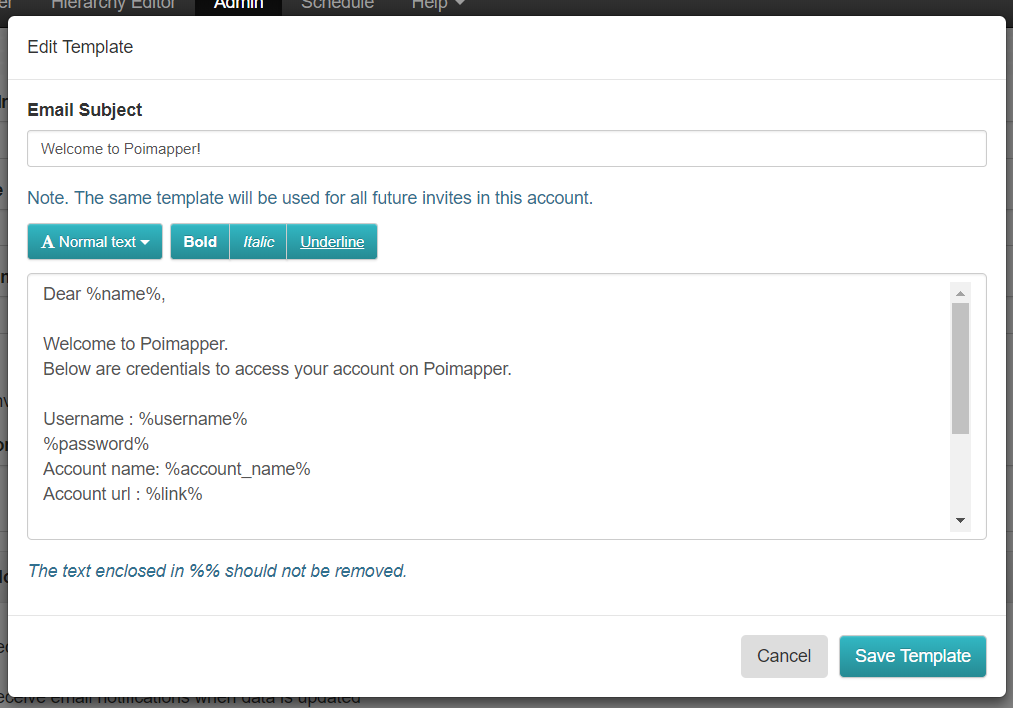
Figure 8: Invite Template
Send Reports by this user to the following Emails
A shown on Figure 8, below the ‘Send Invite’ Checkbox, there is a text box where you can specify emails that you want reports created by this user to be sent. It is possible to input more that one emails, separating each email with a comma
Can only access shared data
This checkbox is automatically checked if the user was registered by sharing data. Typically this checkbox is not checked manually but can be unchecked if there is a need to share more data with the user.

Figure 9: Can Only access shared data checkbox
Email Notifications
This option allows one to specify on what they want to be notified on their email. And it has three options to choose from:
Receive email notifications when new data is created - When this is checked , an email is sent with email subject ‘New Data Added in Poimapper’, email content containing the name of the created data point, name of the user who updated the data point and a ‘View Data Point’ button that when clicked opens up the newly created data point, every time a new data point is created.
Receive email notifications when data is updated - When this is checked , an email is sent with email subject ‘Data Updated in Poimapper’, email content containing the name of the updated data point, name of the user who updated the data point and a ‘View Data Point’ button that when clicked opens up the updated data point, every time a data point is updated
Receive notification when data created by me is updated - When this is checked , an email is sent with email subject ‘Data Updated in Poimapper’, email content containing the name of the updated data point, name of the user who updated the data point and a ‘View Data Point’ button that when clicked opens up the updated data point, every time a data point created by you is updated.
After filling in all the relevant information in the form, click the ‘Save’ button to save the user information.