Adding Groups
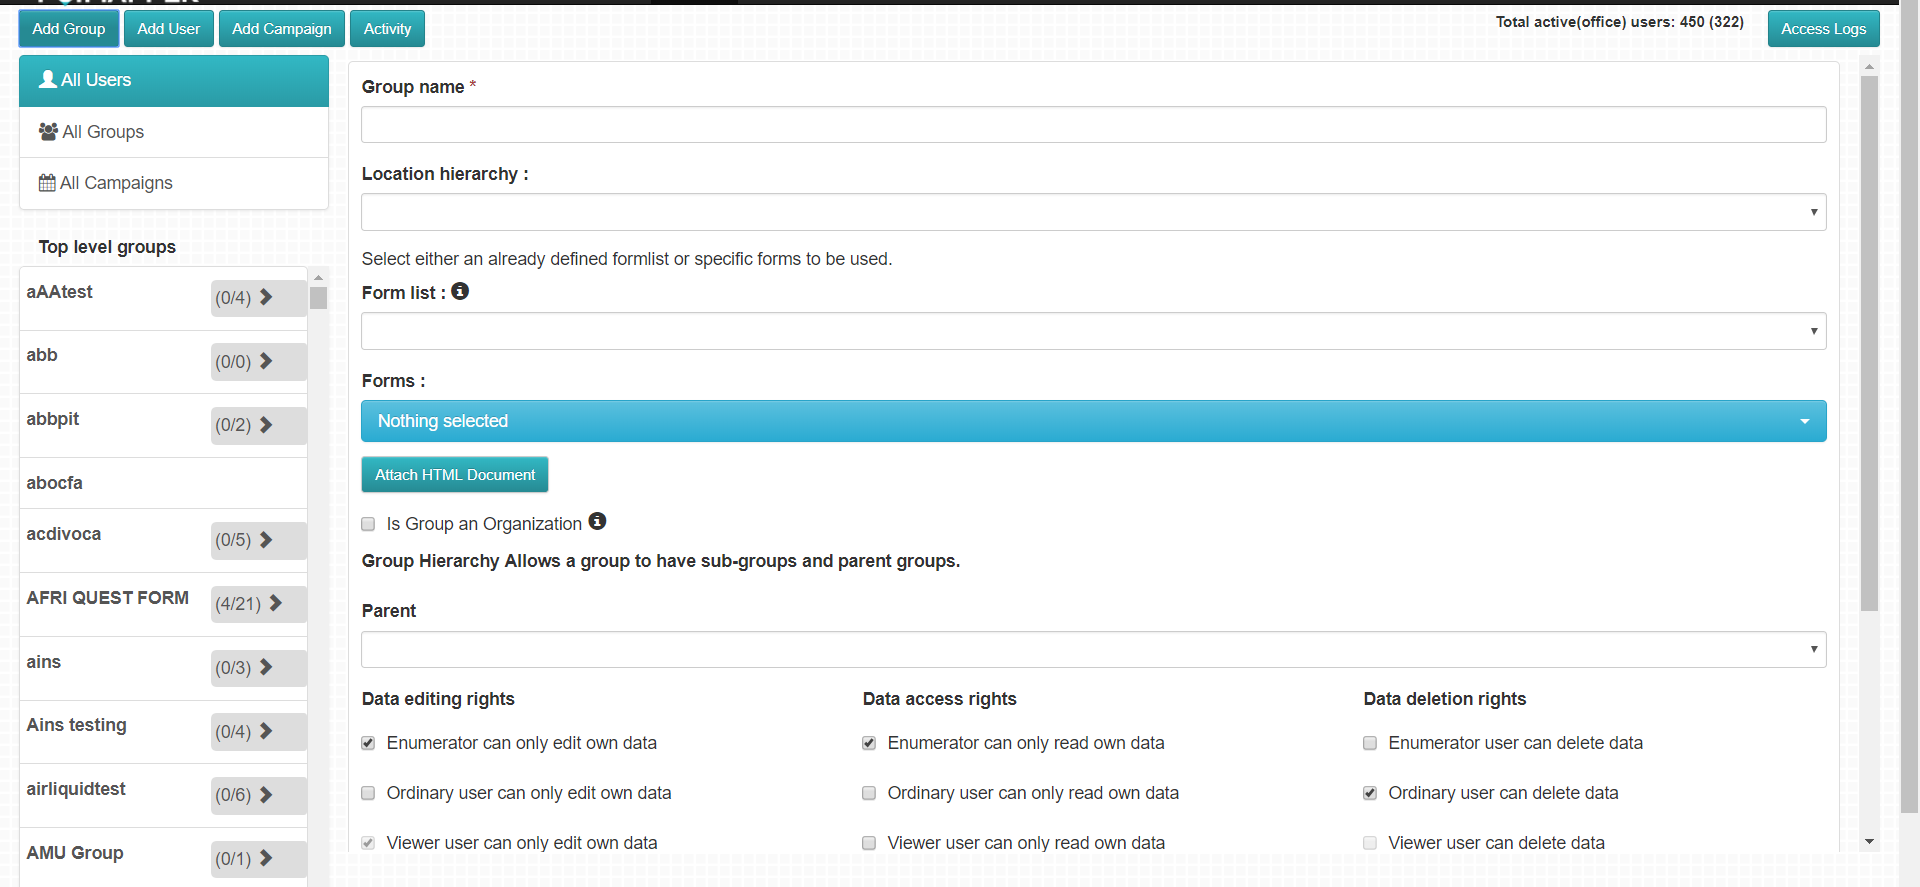
To add a new group, click on the ‘Add Group’ button. The fields marked with an asterisk ‘*’ are mandatory. Figure 2 below shows the screen that is displayed after clicking the ‘Add Group’ tab.

Figure 2: Adding Groups
The location hierarchy field contains a drop down list of all the location hierarchies that have been defined using the Hierarchy Editor. Location hierarchy is not a mandatory field, therefore, in cases where the location hierarchy is not needed, the field can be left blank.
The formlist drop down gives you an option of choosing a formlist to be used in the group you are creating instead of choosing specific forms,if form lists have been defined on the Form Builder.
Under the Forms drop down, there appears a list of forms you can chose, to be used in the group you are creating.
There is also an option of ‘Attaching HTML Document’ by clicking on the button shown. This option allows you to attach a previously created form that was saved in form of a HTML document.
Group Hierarchy
Group hierarchy basically means, having a Parent (main) group , and several sub-groups falling under the main group.
Just below the ‘Attach HTML Document’ there is a checkbox marked ‘Is Group an organization’. Setting a group as an organization will mean admin users within the group will only be able to view form lists, forms, subgroups and groups created within the group.
Since group hierarchy allows a group to have sub-groups and parent groups, there is an option of choosing a parent group by clicking the parent drop down which displays a list of groups that you can choose from. Choosing a parent group for the specific group that you are creating will mean that once the group is created and saved, it becomes a sub-group of the picked parent group. For example, if you are an organization(company), you could decide to create one parent group that has a form that all employees could access, and then have sub-groups created for different departments in the organization e.g, administration department, marketing department e.t.c
Data Editing Rights
Under the data editing rights, data access rights and data deletion rights choose the best options for users (enumerators, ordinary users, task assignees, modeler user and admin users – see section 4 for various users’ descriptions) that will ensure data privacy and security.
Allow ordinary users to share data with unregistered users. The unregistered will be added to the same user group and allowed to access just the specifically shared data.
This checkbox enables sharing of data for instance to external stakeholders such as suppliers or clients. Note: The feature does not apply to enumerators.

Figure 3: Allow Sharing of Data Checkbox
Salesforce
Data From Salesforce to Poimapper
In order for data to be updated in Poimapper from Salesforce, webhooks need to be created within Salesforce for the specific objects. In the admin tool, add a webhook by specifying the form and group. When data is updated in Salesforce for the given Object linked to the form, the same data will be sent to Poimapper. The data within Poimapper will be linked to the group which has been selected in the admin tool. To be able to view the data in Poimapper, the form should be in the formlist for the group.
Provide the name of the web hook and select the form.

Figure 4: Naming Webhook and Selecting a form
After filling in the relevant information in the form, click the ‘Save’ button to save the user group details.
Authorizations
To be able to access Salesforce, a user should give access to Poimapper by signing in to Salesforce and granting Poimapper access to their Salesforce account. This would allow Poimapper to read their Objects & data securely.
If Poimapper has not been granted access, the button would display sign in.