Exporting Data
To export data in the Data Viewer click on the Export button on the top right of the window. A pop up window will then be displayed as shown in the following figures.
a) Export in excel format
Select a form to export.
Select the format of the exported data to be ‘Excel’.
To separate the data from different form pages to separate excel sheets select the ‘Separate pages into Excel sheets’ checkbox.
To include files and images in the export, select ‘Include associated files and images’ checkbox.
To display every selected option as columns for multi-select questions, select the ‘Separate columns for check box options’ checkbox.
To include deleted data points, select the ‘Include deleted data points’ checkbox.
To include IMEI of the device used, select the ‘include IMEI of the device used’ checkbox.
To include subform question text, select the ‘ Include subform question text’ checkbox.
To include editing time information, select the ‘Include editing time information’ checkbox.
To include data history trace, select the ‘Include data history race’ checkbox.
To include unique data identifier, select the ‘ Include unique data identifier’ checkbox.
To view codes for single/multi-select questions, select ‘Export codes for single/multi-select question’.
To view location codes in the data instead of the location names, select ‘Export location codes instead of location names’.
To view question reference names as column headers instead of the question text, select ‘Use reference names as column headers instead of question text’.
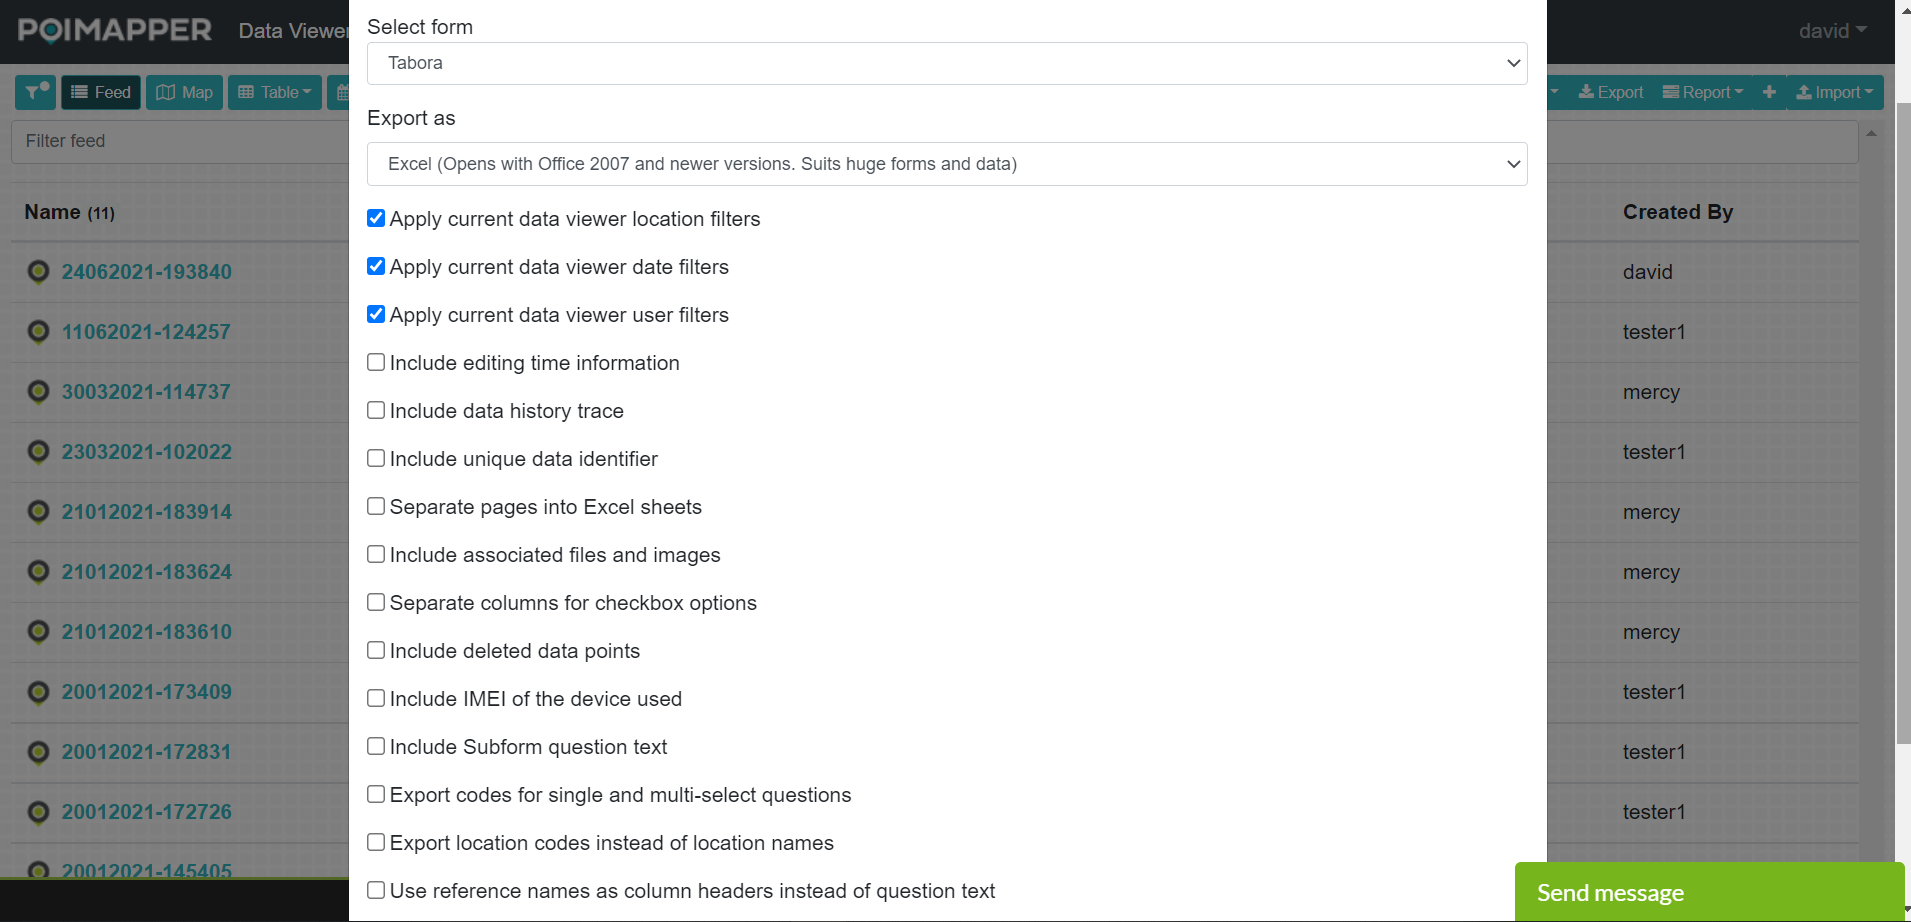
Figure 26: Export to Excel
b) Export to CSV or KML
Select a form to export
Select the format of the exported data to be ‘CSV’ or ‘KML’. For KML, only POIs with points which are displayed on the map will be transferred to KML.
For CSV:
To include editing time information, select ‘Include editing time information’ checkbox.
To include data history trace, select ‘Include data history trace’ checkbox.
To include unique data identifier, select ‘Include unique data identifier’ checkbox.
To view codes for single/multi-select questions, select ‘Export codes for single/multi-select question’.
To view location codes in the data instead of the location names, select ‘Export location codes instead of location names’
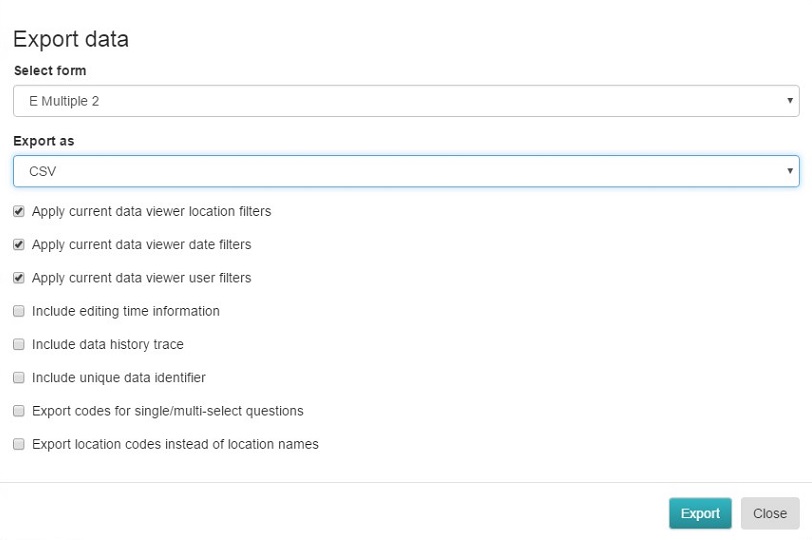
Figure 27: Export to CSV
c) Export to Word
Select a form to export.
Select the format of the exported data to be ‘Word’.
To include files and images in the export, select ‘Include associated files and images’ checkbox.
To leave out unanswered questions, select ‘Leave out unanswered questions’ checkbox.
To view subform positions on background diagrams, select ‘Include an image for each subform to show its position on the diagram’ checkbox.
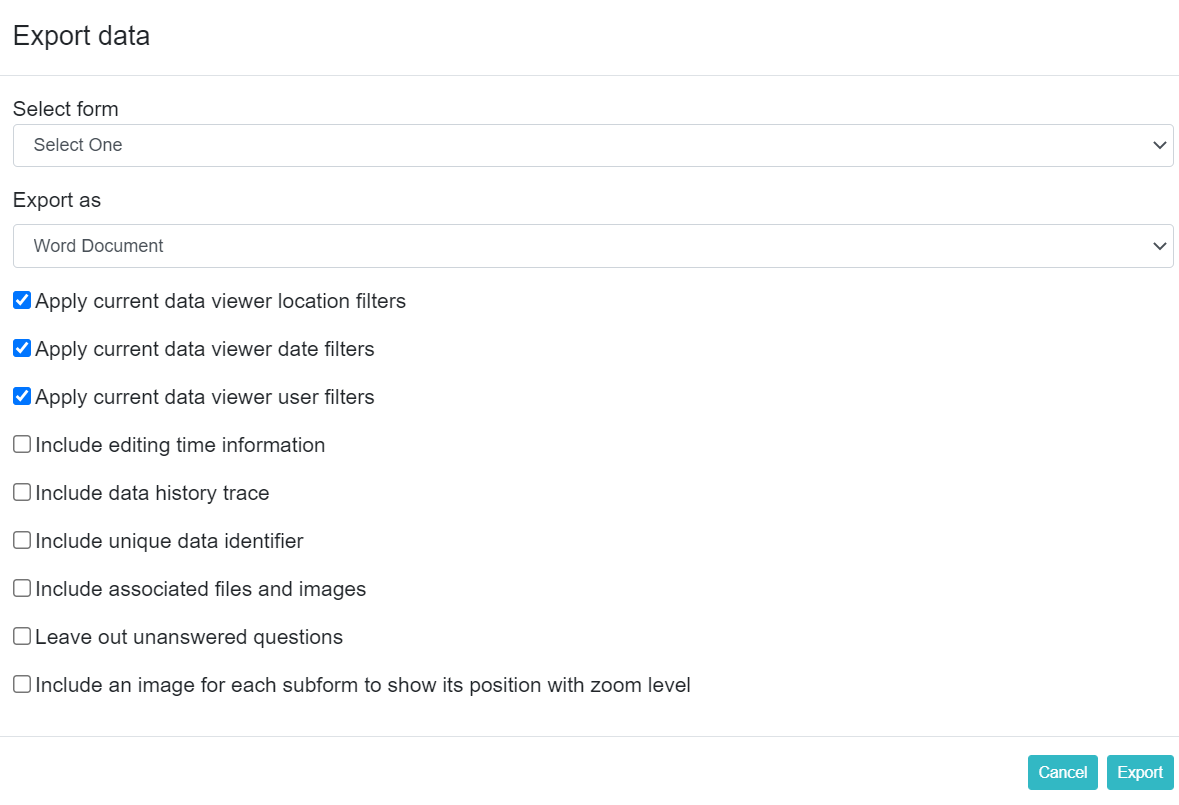
Figure 28: Export to Word
d) Export to SPSS
Select a form to export.
Select the format of the exported data to be ‘SPSS’.
To display every selected option as columns for multi-select questions, select the ‘Separate columns for check box options’ checkbox.
To view codes for single/multi-select questions, select ‘Export codes for single/multi-select question’ checkbox.
To view location codes in the data instead of the location names, select ‘Export location codes instead of location names’

Figure 29: Export to SPSS
e) Export to Google Sheets
Select a form to export.
Select the format of the exported data to be ‘Google Sheets’.
On the first time of using google sheets export, you’ll need to sign in/Authorize your google account firts, by clicking the sign in button shown on the image below.
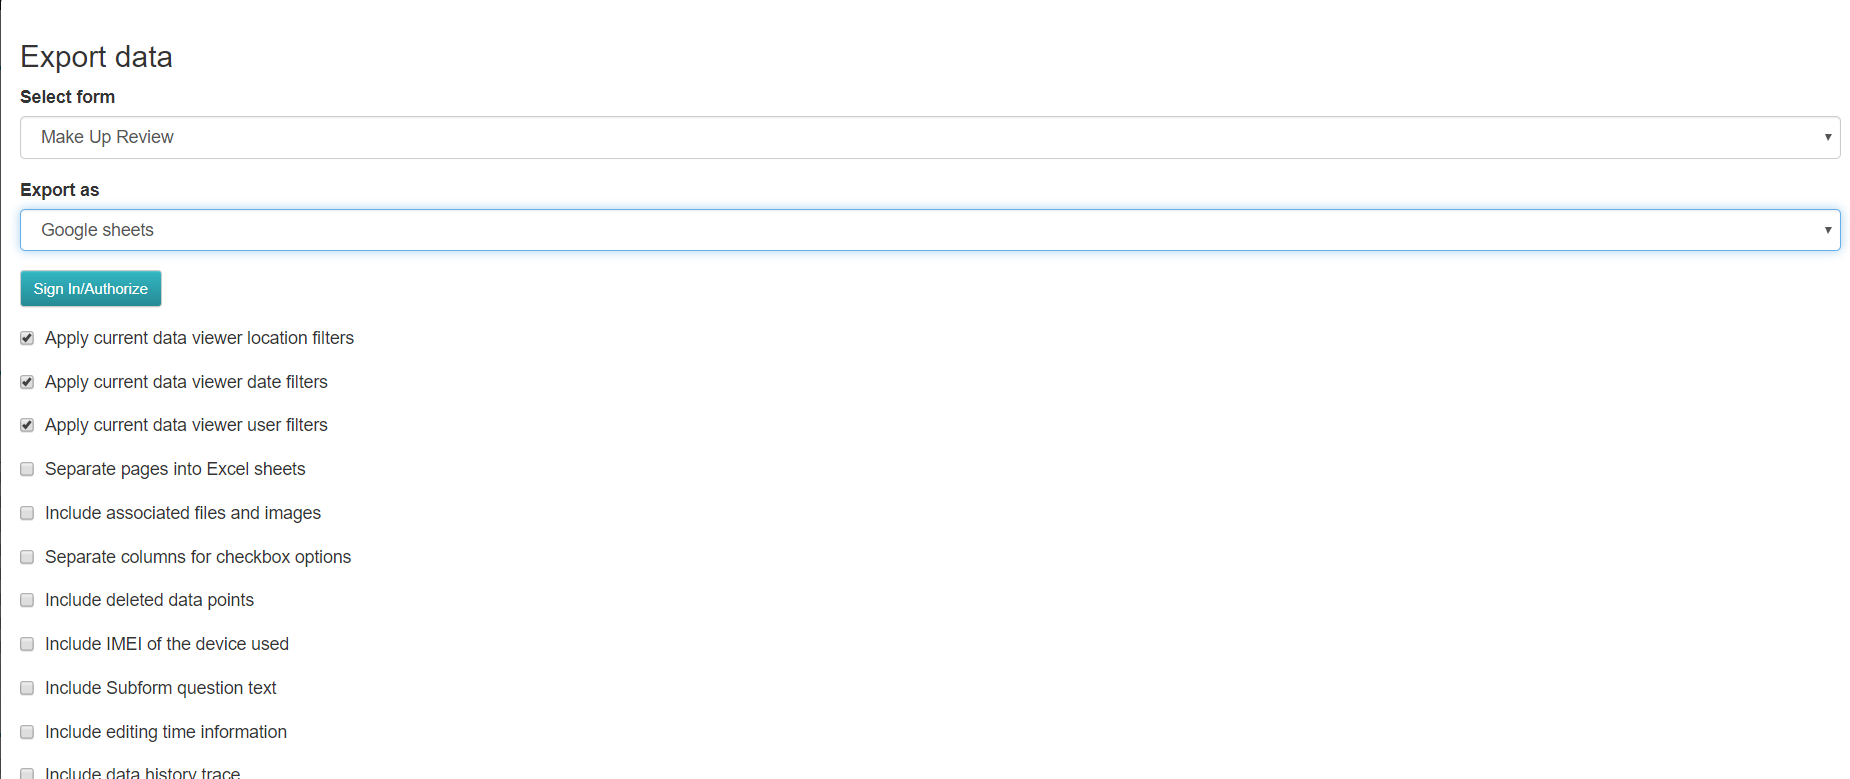
Figure 30: Export to Google Sheets
To separate the data from different form pages to separate excel sheets select the ‘Separate pages into Excel sheets’ checkbox.
To include files and images in the export, select ‘Include associated files and images’ checkbox.
To display every selected option as columns for multi-select questions, select the ‘Separate columns for check box options’ checkbox.
To include deleted data points, select the ‘Include deleted data points’ checkbox.
To include IMEI of the device used, select the ‘include IMEI of the device used’ checkbox.
To include subform question text, select the ‘ Include subform question text’ checkbox.
To include editing time information, select the ‘Include editing time information’ checkbox.
To include data history trace, select the ‘Include data history race’ checkbox.
To include unique data identifier, select the ‘ Include unique data identifier’ checkbox.
To view codes for single/multi-select questions, select ‘Export codes for single/multi-select question’.
To view location codes in the data instead of the location names, select ‘Export location codes instead of location names’.
To view question reference names as column headers instead of the question text, select ‘Use reference names as column headers instead of question text’.
f) For all export types
To include editing time information, select ‘Include editing time information’ checkbox
To include data history trace, select ‘Include data history trace’ checkbox
To include a unique identifier for each POI instance, select ‘Include unique data identifier’
‘Apply current data viewer location filters’ , ‘Apply current data viewer date filters’, and ‘Apply current data viewer user filters’ checkboxes are automatically checked and will filter in reference to the location, date and user(s) selected respectively as outlined in section 2, by setting the filters before opening the export window.
Finally click on ‘Export’ to export the data and a file will be downloaded as per the format chosen.
Note: Editing Time information generally includes:
Upload Time - records time the form is uploaded
Device Edit Entry - records the time of data entry on the phone
Phone Edit Time - records the duration the data was edited on the phone
Portal Edit Time - records the duration data was edited in the portal
Portal Edit Entry - records the time of data entry in the portal
Modified Time - records the time data was edited