Viewing and Editing Data
Data is viewed and edited by using the Data Point View. This view can be accessed by clicking on:
Add Data button
A marker on the Map view
The name of a data point in the Table view, Schedule view or Task view
The data icon of an image in the Image view
When accessing a data point, i.e. an instance of a form, the Data Point Viewer is opened. By default it shows all pages of the form under each other. However, it is also possible to show the data one page at a time, if the option Show data per page has been selected when defining the form in the Form Builder.
Note: If the data is shown per page and a page contains calculation statements, those will only be computed if the corresponding page is opened. Thus before saving the final version of a data point that contains calculation statements, all pages containing these statements should be opened.
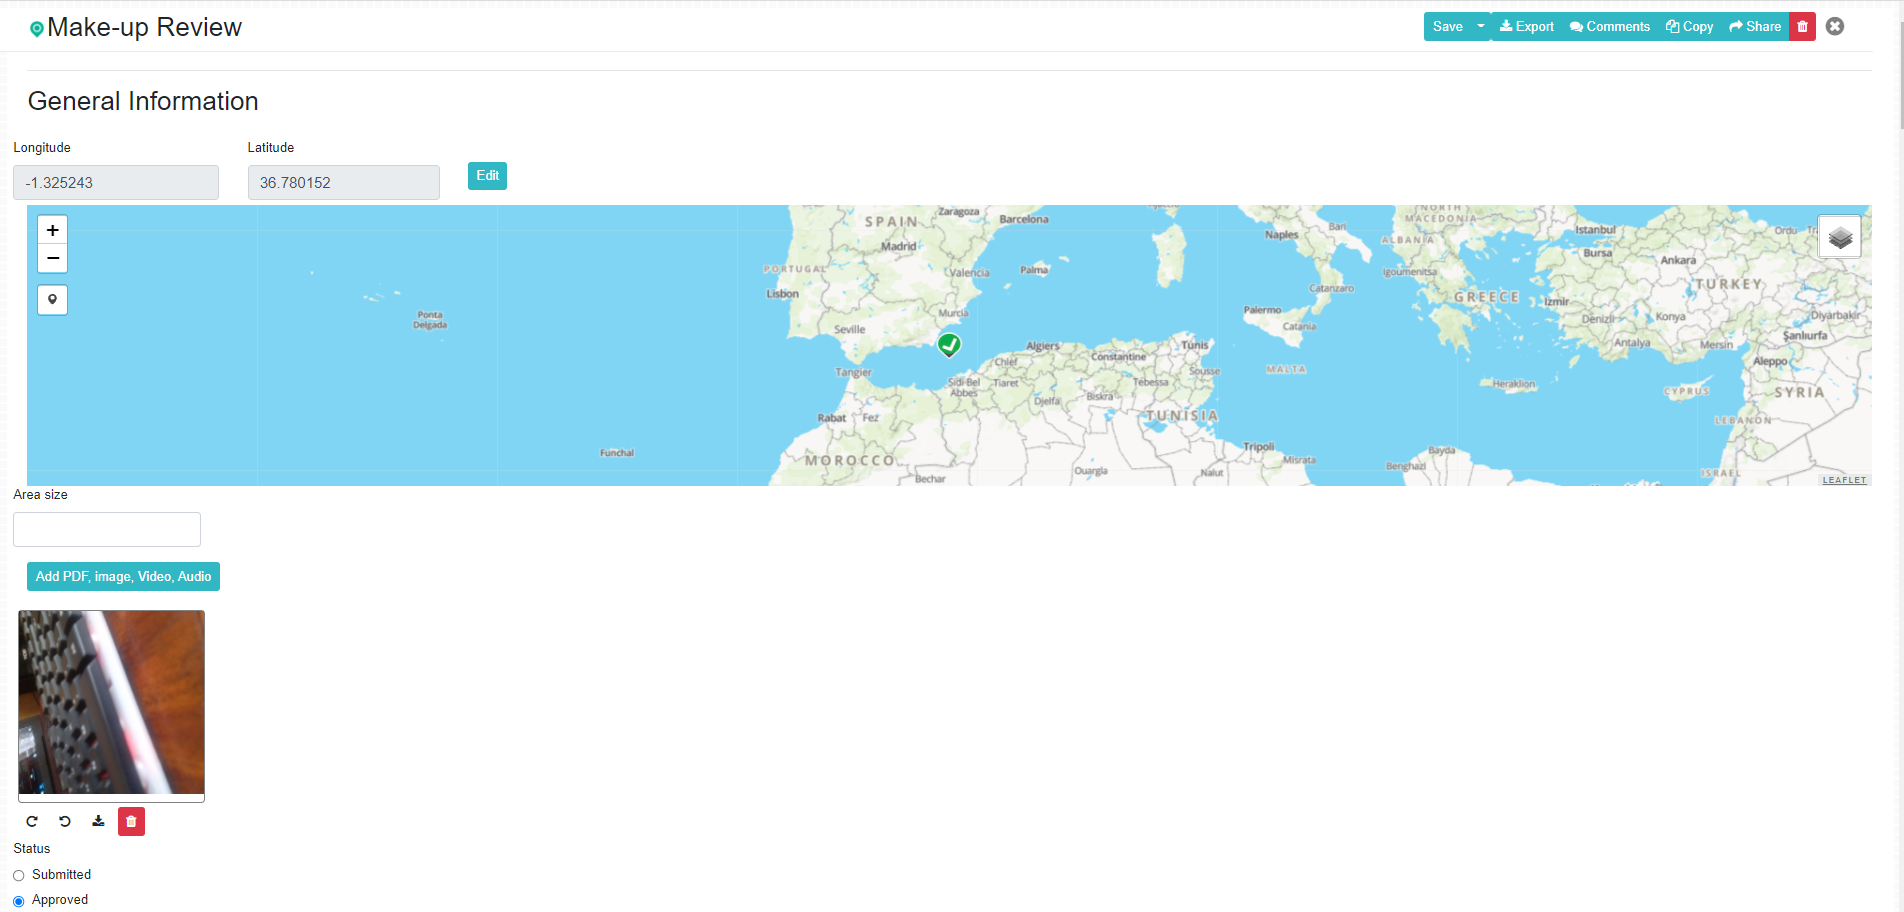
Figure 19: Data Point View
By default all data is shown such that each data field is on its own line. However, if the Use 3 column layout option has been chosen for the form in the Form Builder the data will be shown with three fields in parallel, unless a new line is enforced when defining the form.
Figure 20: Data Point View with 3 column layout
If the form has GPS coordinates chosen then a map will be shown for the data point. To add coordinates to the newly created data point click on the marker located on the left of the map and select the preferred location on the map. The marker will be placed on the exact location.
If the address questions are part of the form, the address is automatically added to the data point based on reverse geocoding when the data point is placed on the map.
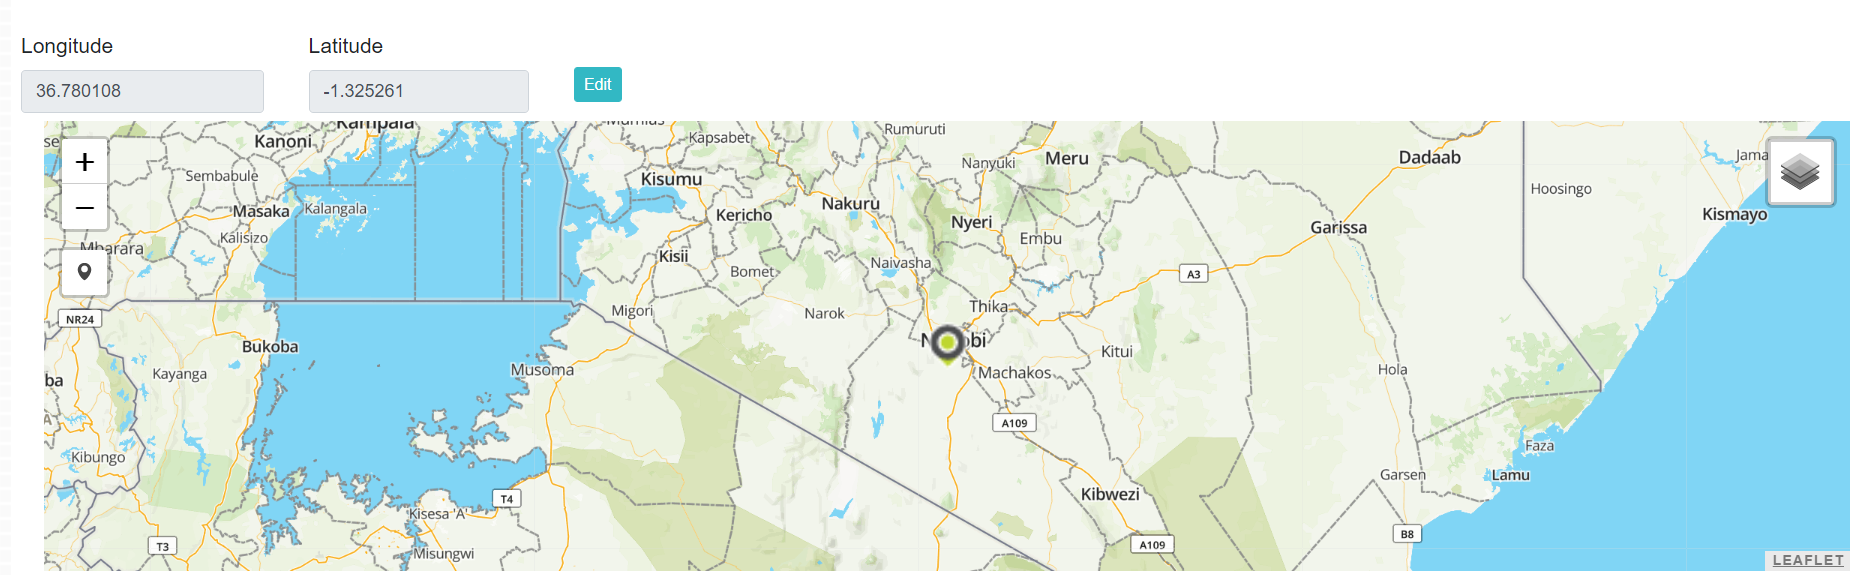
Figure 21: Add location
If the form has the location hierarchy enabled and the user group has a location hierarchy, then the user can select the location of the data point. The number of hierarchy levels available when selecting the locations have been defined in the Hierarchy Editor, but can at most be four levels.
If the location of the current data point is not yet defined in the location hierarchy, the user can add new locations to the hierarchy, if this is enabled for the user’s user level in the Form Builder. The added location will be added to the common location hierarchy.
Attach files
If the attach image, audio, video or PDF feature has been enabled, these can be added either at the form level or for specific fields in the form. Already adttached files will be shown as clickable icons and the corresponding file can also be downloaded or removed. The actual file is not deleted even if the user removes it in the view, because earlier versions of the same data point may still refer to the file, and we keep the full edit history of every data point.
Search and filter dynamic subforms
If the form has a subform and the setting ‘Allow only one subform to be used’ is not enabled, it is a dynamic subform. A search bar is available to filter and search dynamic sub-form instances in Data Point View. By default, each dynamic subform is assigned a system generated subform instance ID that can be used to search the desired subform.
If the subform contains a text field which has Show this in the selection list of subform instances in the parent form enabled on advanced form builder, the text appears against the subform instance ID and can also be used to search and filter subform instances in Data Point View.
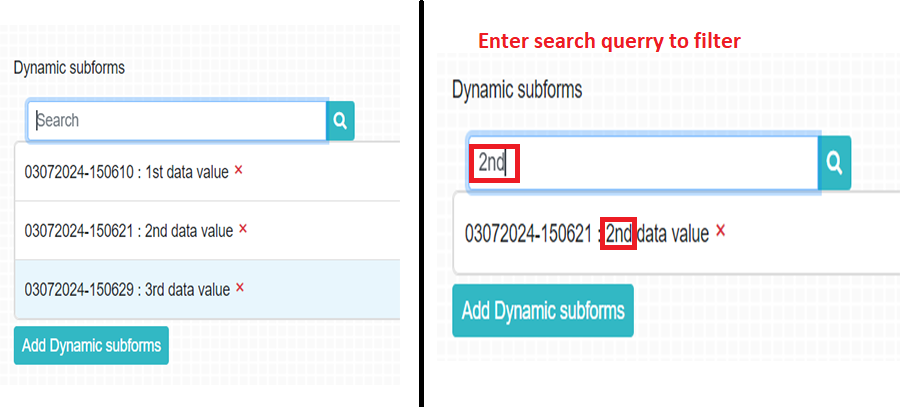
Figure : Search and filter
Transcribing audio
Usually, poimapper will begin transcibing audio after a user saves a data point with an attached audio file for a text field with transcriptions enabled. To see the transcriptions before saving the data point, click the Transcribe button below the audio file and wait a few seconds.
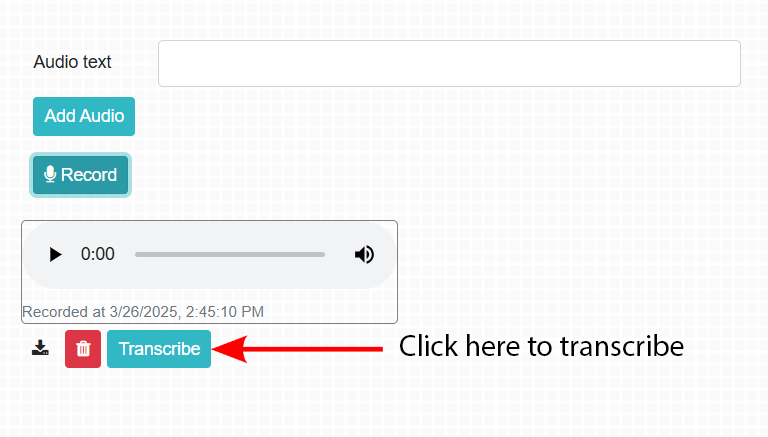
Figure : Transcription button
Export, Save and Close
To export the data of a data point click on Export, which will give two options Excel or Word. If a custom export template has beén defined then the corresponding export format is given as the default option.
If a custom Excel format has been defined and that contains more than one sheet then the export file will be sent via email to the email address defined for the user.
If a custom export format has not been defined all the data of the data point will be shown in a default Word export format and just in one row in Excel.
To ensure that the changes done to the data are included in the export, it is suggested to first save the data before exporting.
To save the data click on the Save button at the top of data view. When saving it is checked if all mandatory data has been filled and saving will not be allowed unless all mandatory data, also for the subforms, have been given. If you want to save the data without entering all mandatory data, you can save the data as Draft.
When adding new data, there is in addition the option for Save and New, which will save the added data and open a new empty form to be filled. When the data point is saved, also the date it was created and by whom will be recorded.
The close the data point view click on the X button in the upper right corner. If data has been edited you will be asked to confirm the exit without saving.
When exiting the data point the control will return to where it was opened from.
Reference table
A reference table is a table that contains data which refers to a subform within a form or data from another form within the formlist.
If the option Include an action per row has been selected in the Form Builder then the header section of the reference table includes the Transmit button and the additional fields Action Status, Actions by Supplier, Owner, Plan Date,and Closure Date.
When clicking the Transmit button a send dialog opens with a Send-to field to select an existing user from a drop down.
If the Share to an undefined user is enabled per group in user admin then data point can be shared also to a user even if the user has not been previously defined. The person to whom the data is shared will be defined as an enumerator who can only access specifically shared data. A Share with unregistered user field to share with an user that has not been registered yet is shown.
When transmitting the Access Until date is optional. In addition an optional message can be included in the email, the e-mail will contain by default the message that data has been shared and a link to the data point is included.

Figure 22: Transmit Button
An enumerator that has been defined as can only access shared data can only transmit the data back to the user who sent the data originally.
A email is sent with a link to the data point in which the reference table is with the subject “Actions updated”.

Figure 23: Send-To Pop up
Note If the shared-to user is in another user group, the user has to be moved to the current group to be able to share the data.
If “Plan date” is reached and no “Closure date” is filled then an email reminder is sent out per action to all users to whom the actions have been previously transmitted. The subject field is “Reminder to complete action” with the body containing a link to the audit and text “Please complete action xxx” where xxx is the action definition.
Status Field and Comments features
The Status field is useful for data that needs to go through an approval process. When the data is uploaded, the status will be ‘submitted’. If the data collected is not satisfactory, the status can be changed to needs editing and it can be downloaded using the Mobile Client application for editing again. Approved status signifies that the data has been approved.
To include the Status field for a particular form, navigate to Form Builder window and select the Include Status field check box. Once you have included the Status field, you can now update the status when adding or editing a data point.
The status field feature provides three choice options:
Submitted
Approved
Needs editing
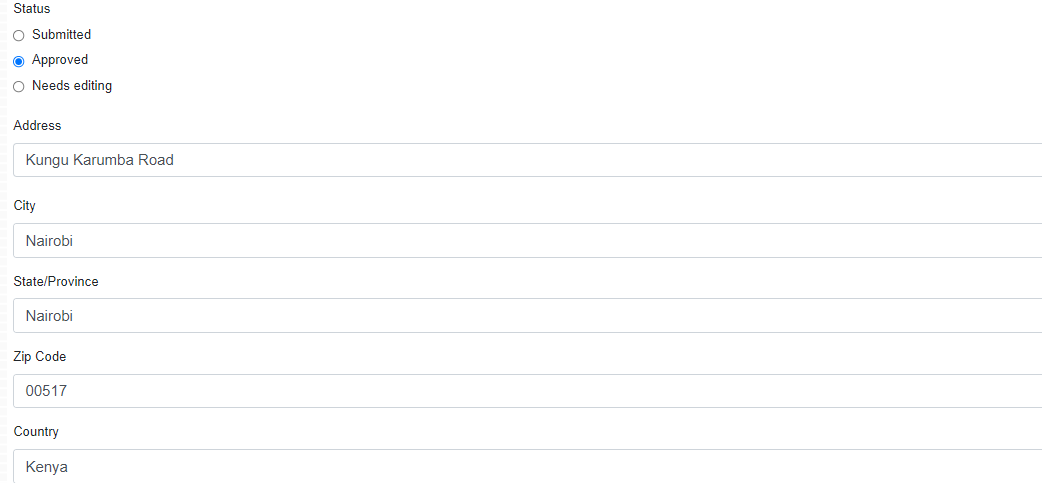
Figure 24: Status field
The Comments feature enables you to add comments to a particular data point.
You can also view existing comments.
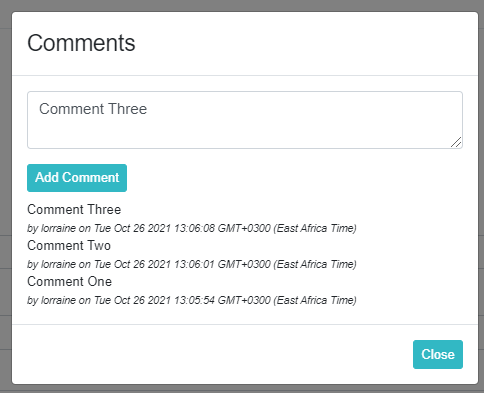
Figure 25: Viewing existing comments and adding new comments
The comments field is particularly relevant in combination with Status field, because it enables adding comments why the status Needs Editing is given.